side bars

Showing posts with label Kaisercraft. Show all posts

Wednesday, January 15, 2014

CHA 2014 .... my winner's list

I had the amazing opportunity to attend CHA (Craft and Hobby Association) Mega Show this year in Anaheim.

For those who are not aware of what CHA is all about, it is a tradeshow for all of the crafting companies to display their newly released products to retailers for pre-order.  And for the first-timer it is a little overwhelming to have so much stuff under one roof and vying for your attention. 

It is a great place to spot current trends and to try and figure out what will be this season's "hot" item.  I have compiled a list of my favorite products from this CHA.  Some are my own photos and some are stock photos from the companies themselves.

Best New Paper Lines

1. Melissa Frances - The Sweet Life - by designers Jenny & Aaron.  Of whome I met and spoke to Aaron at length about their collection.  Each of the pages was hand painted, not computer generated as most paper lines are created today.  Aaron was telling me that he and Jenny are often hired to paint murals and wall décor, so when they have a job that requires repetition of the same image it is all done by hand and you will find slight differences in each repeated image, this gives it the character and individuality.  I especially love the page that has the cupcakes and roses on it (blue background).
 
 
2.  Authentique - Glistening - filled with powder blues, and beige, this collection lives up to my expectations from Authentique.
 
 
3. KaiserCraft's - Limelight collection - shipping March 2014.  I love this pallet, and it is perfect for boys, girls, outdoors, pretty much anything.  It can be paired with natural products like burlap, twine, wood and canvas.  Really looking forward to this collection.  If anyone remembers how much I loved the Origins collection from Basic Grey, you will understand why I love this upcoming line.
 
 
4. Glitz Design - All Dolled Up - beautiful collection combining light yellow/Ivory and pinks.  Amazing rendition, and refreshingly different from the others.
 
Best new Tools
 
1. Spellbinders - Tool n' One.  A wire roller brush on one side and a poke tool on the other, this tool is a master at getting those little confetti pieces out of the increasingly popular intricate dies that are flooding the market right now.  You will not be disappointed, I sure wasn't.
 
2. Sizzix - Magnetic platform - ingenious!  I have been waiting for something like this, I was using a magnetic sheet under my flat dies, and with some success, but this is all together and the correct thickness.  Thank you Sizzix.
 
3. Marion Smith's - Bloom Impressions - makes shaping and forming petals so easy!
 
Best new Dies
 
1. Sizzix - Susan's Garden dies - she is a botanist first and a designer second.  Susan has created these flower dies that are so true to life that you will have a hard time telling real from paper!  I really wanted to get in on one of her make n' take demos, but the line up was just too long, so I was a lurker instead.  Amazing the detail for these dies.
 
 
2. Spellbinders - Little Darlings - Darling Square Die.  The large frame measures just over 6x6 and will make a perfect filigree perimeter for a 6x6 card or a photo frame for a layout.  Use of Instagram photos is gaining in popularity and this square frame will be perfect!


Best new Stamps
 
1. Penny Black - I fell in love with the Penny Black card making kit, I bought it right on the spot!  You will be in awe of the detail they put into their cards.  Watch for an upcoming class at Auntie Em's in March for this class!
 
2. Stampendous - HUGE stamps - begging to be coloured with Copic's
 
3. Prima's Bloom Girls - designed by the Uber talented Jamie Dougherty - I'm so happy to say I already own this girl and will be colouring her up VERY soon.

Best new Embellishments
 
1. Prima resin - so many different resin pieces coming out - my absolute favorites are the cherubs and the seashore collections.


2.  Queen & Co. Deco Dots - different from what else is on the market - love the lines in them
 
Trendspotting
 
My observations for this CHA include:  metallics - particularly GOLD.  I believe you will continue to see more of this trend throughout the year.
 

Flowers dies - it seems that every company has a flower die of some sort out, many have teamed up with Sizzix or Spellbinders, but some are venturing out on their own.  The trend of handmade flowers is still around and still being pushed by the industry.
 
Foxes - they are everywhere, most popular animal I have seen this CHA - could it be due to the popularity of the Ylvis song "What does the Fox Say"?!  I don't know, but I think they are adorable!
 
Resin - both clay resins and clear resins seem to have hit this CHA by storm - jewelry making and covering paper flowers
 
Pink & Blue - nearly every paper company had their version of a baby pink and baby blue line.  I love those colours together, believe me I do, but it was hard to find anything else.  I was surprized at the lack of purple on the market this year.
 
Maps- I love maps and travel lines - and there is no shortage of it out there this year, with Prima, KaiserCraft, Websters Pages, Echo Park among others having each their own lines.  There is a whole lotta choices out there, and mixing and matching lines will be easy with the themes.
 
Pocket Scrapbooking - still popular - more and more companies are putting out lines that lend well to this popular trend with journaling cards, ATC cards, and their own versions of the albums.
 
Well there you have it folks - a pretty long blog post - but this is just the tip of the ice burg for this CHA - there was so much to take in and see, and I'm quite certain that I missed heaps.  Stay tuned for new projects from me and use of all the beautiful lines I have picked up at CHA.
 
Please let me know your favorite product picks from this CHA - did I overlook something? Did I miss something you love?  Or do you share the same loves as I do?  Your comments are cherished and appreciated.


Tuesday, December 4, 2012

Advent Calendar for years to come

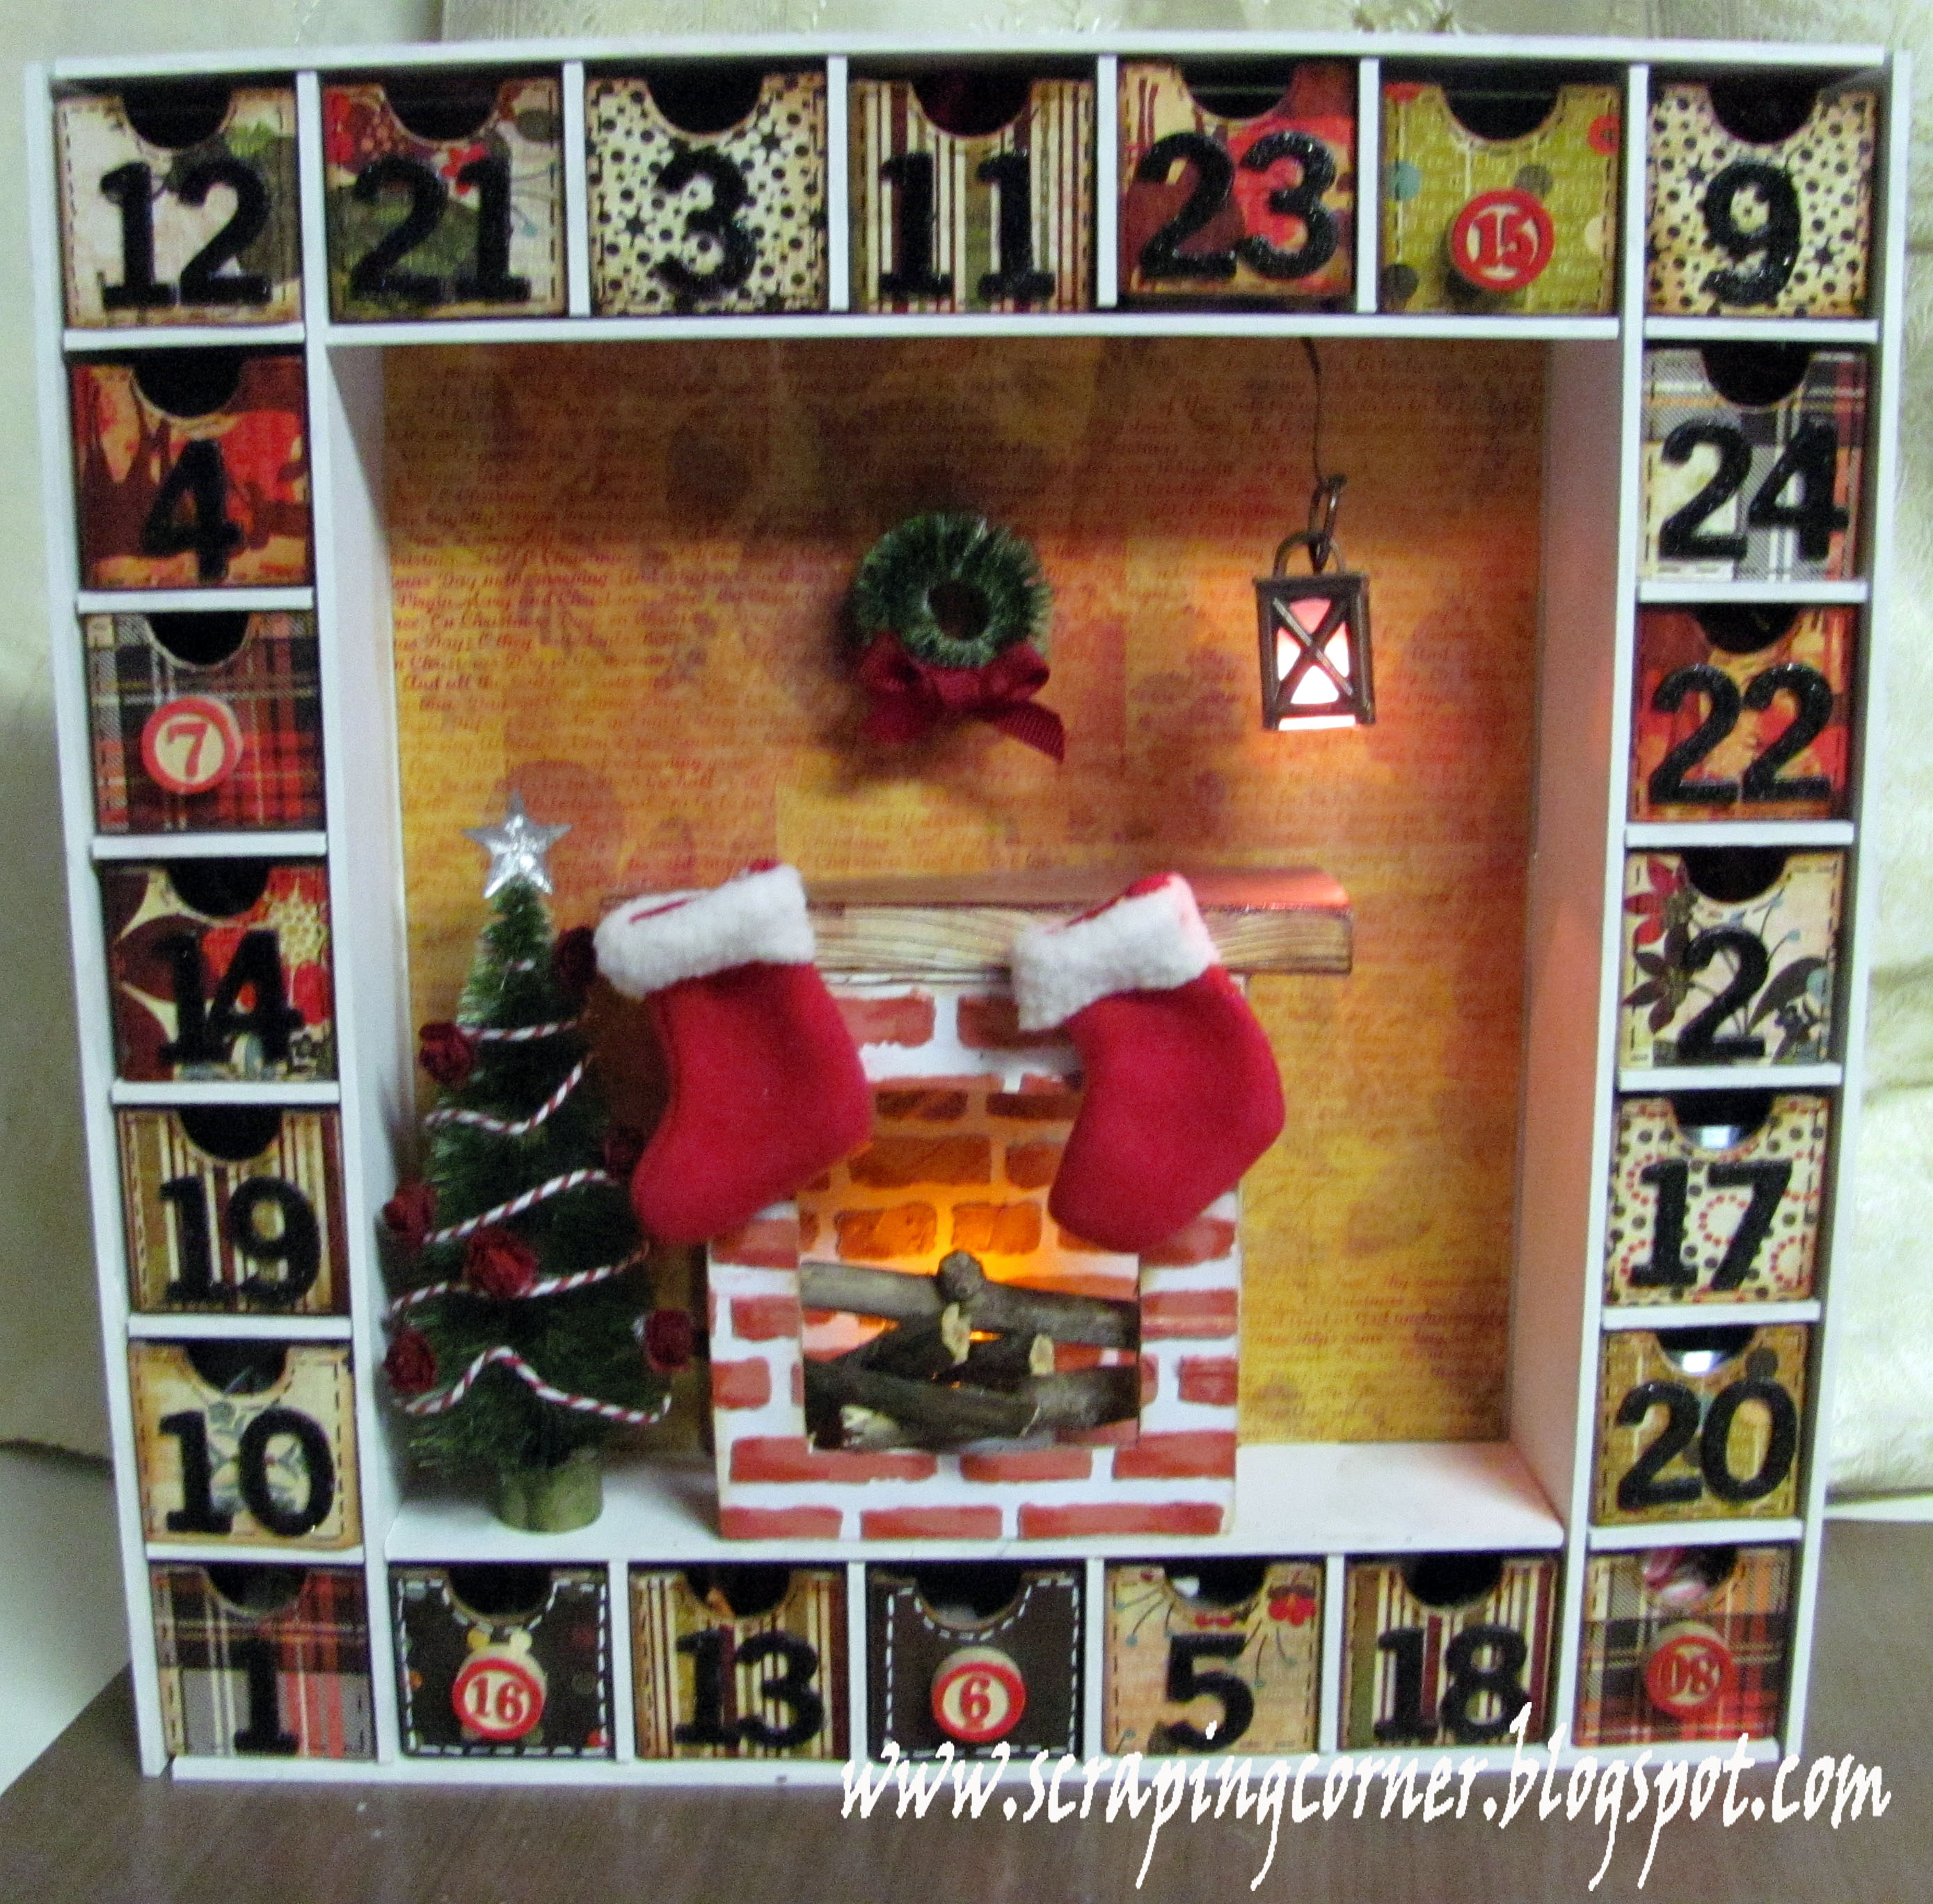
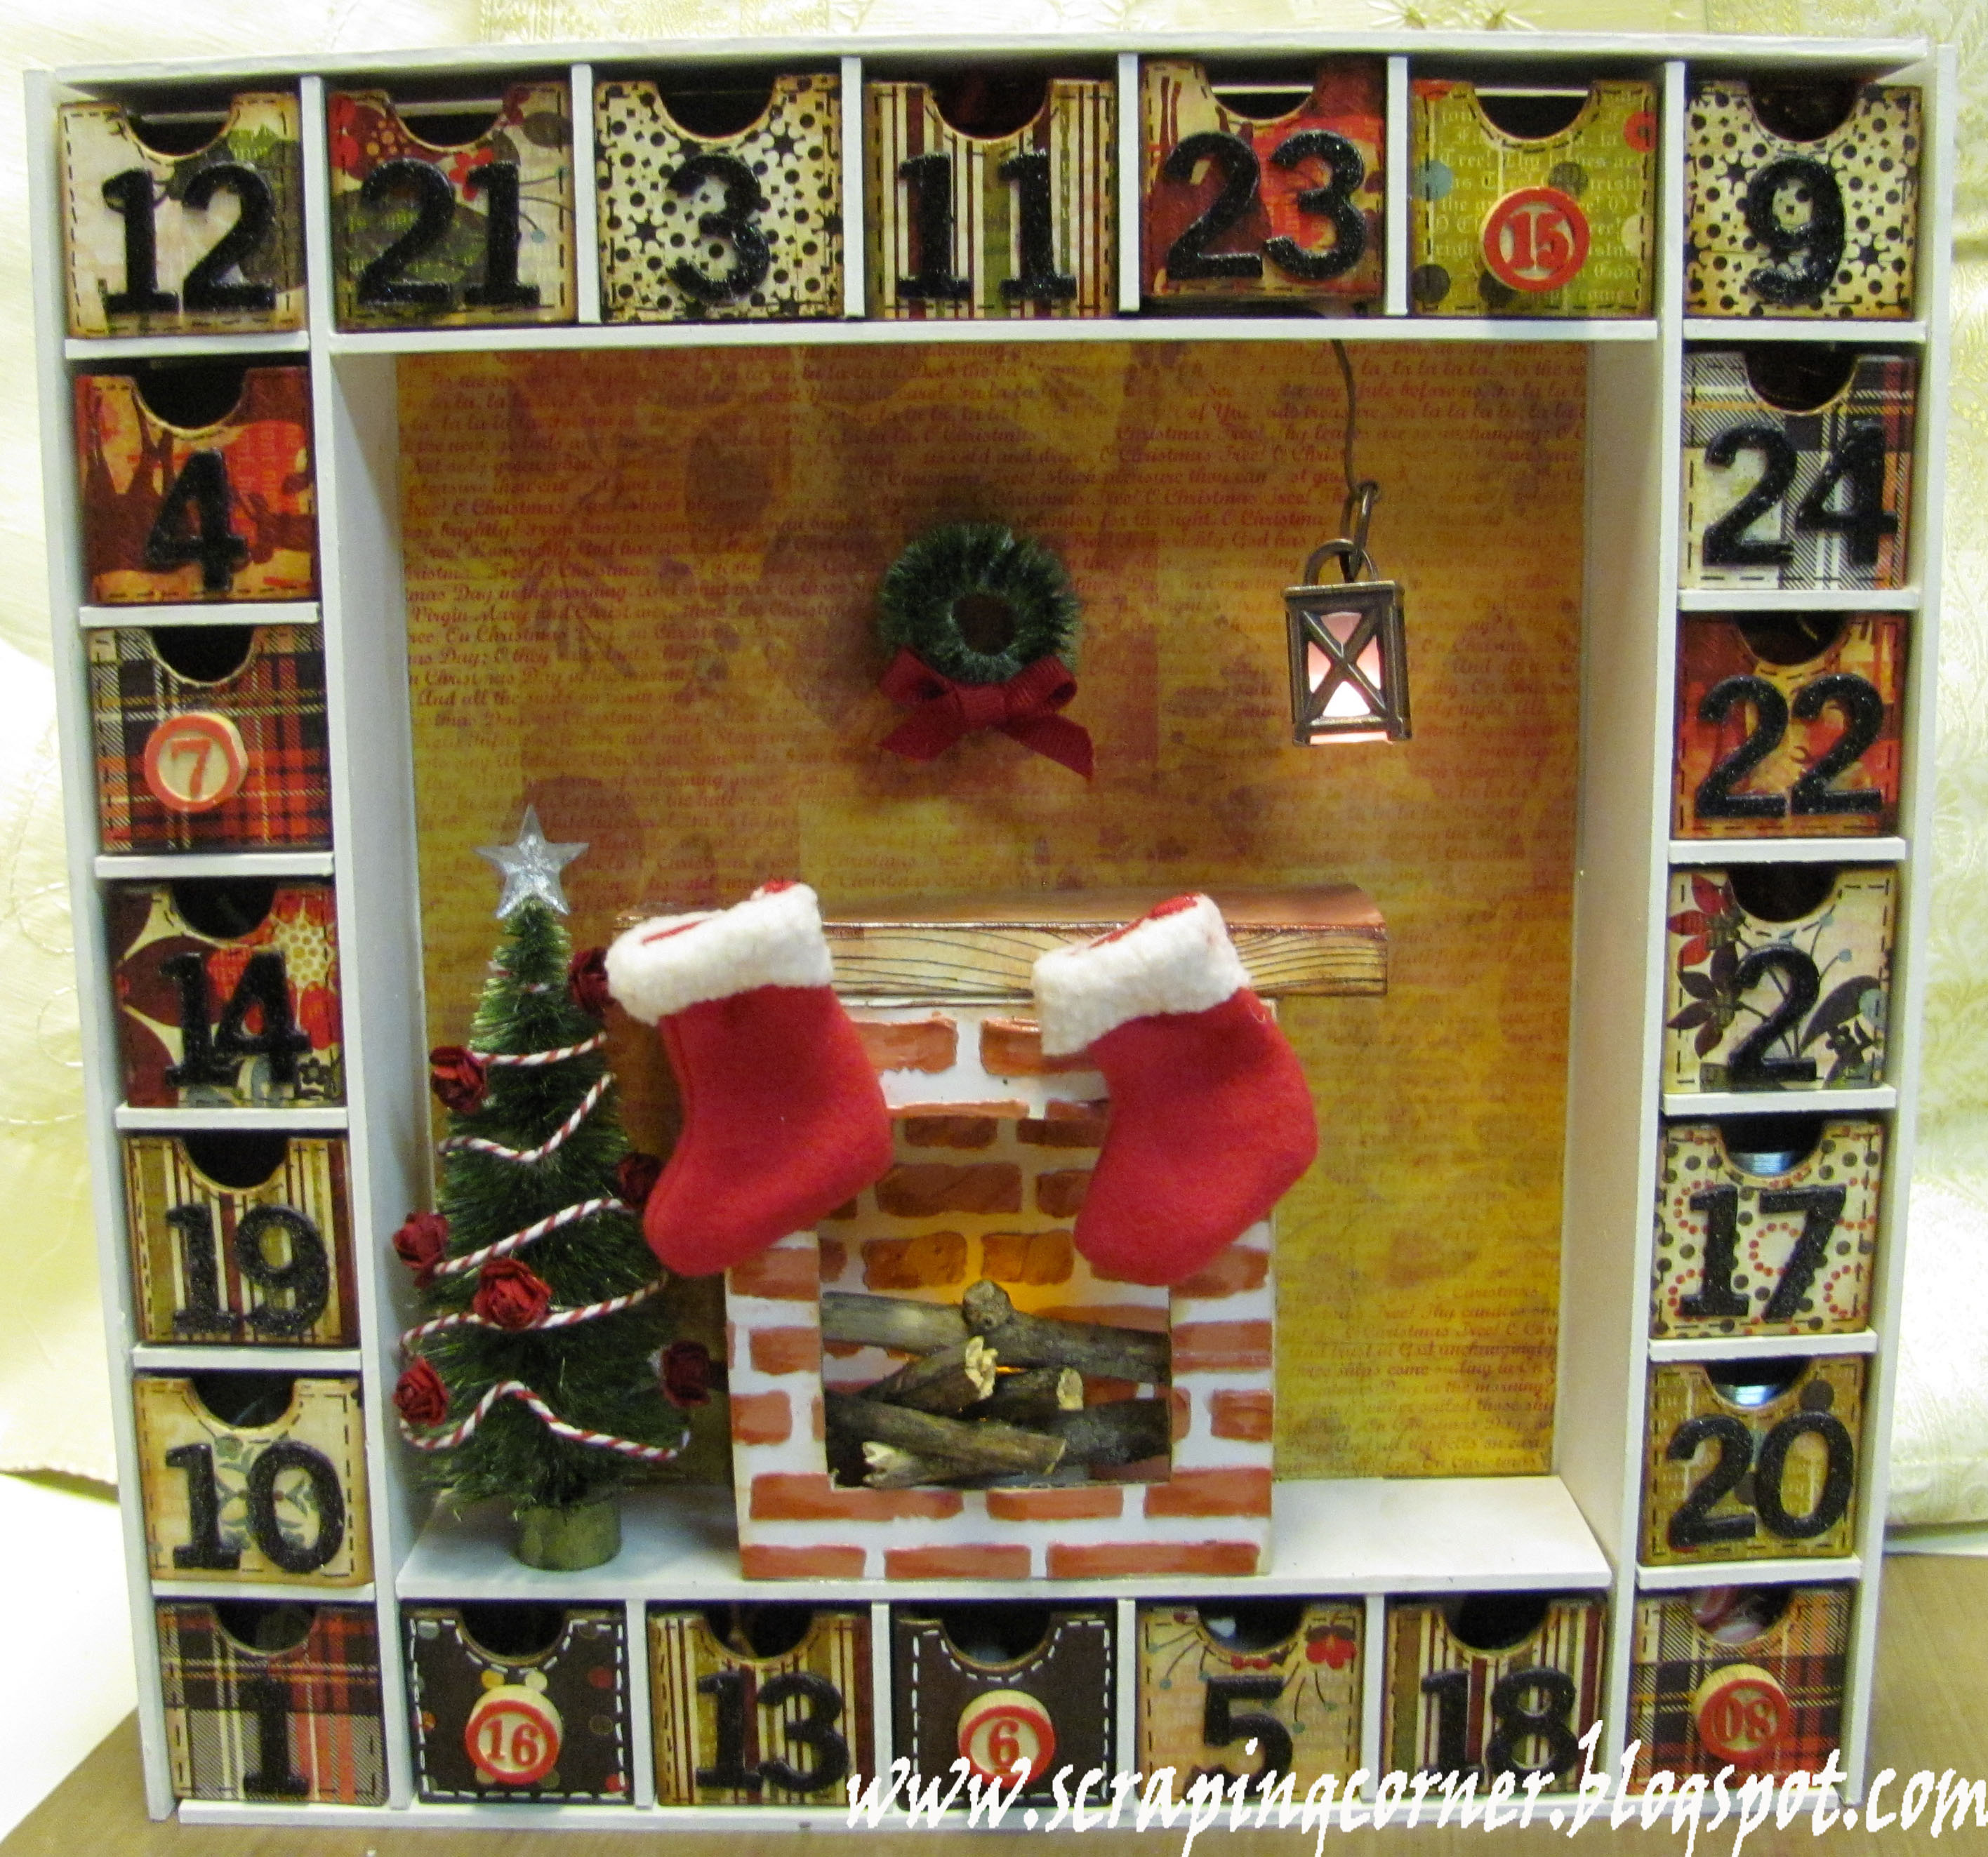
When Emma had her sale this summer I bought a Kaisercraft Advent calender with hopes of having it done by December 1st for the kids to celebrate the season with .... well I'm not horribly late - just tardy as per my predictable self!  I finished it today - December 3rd!
 
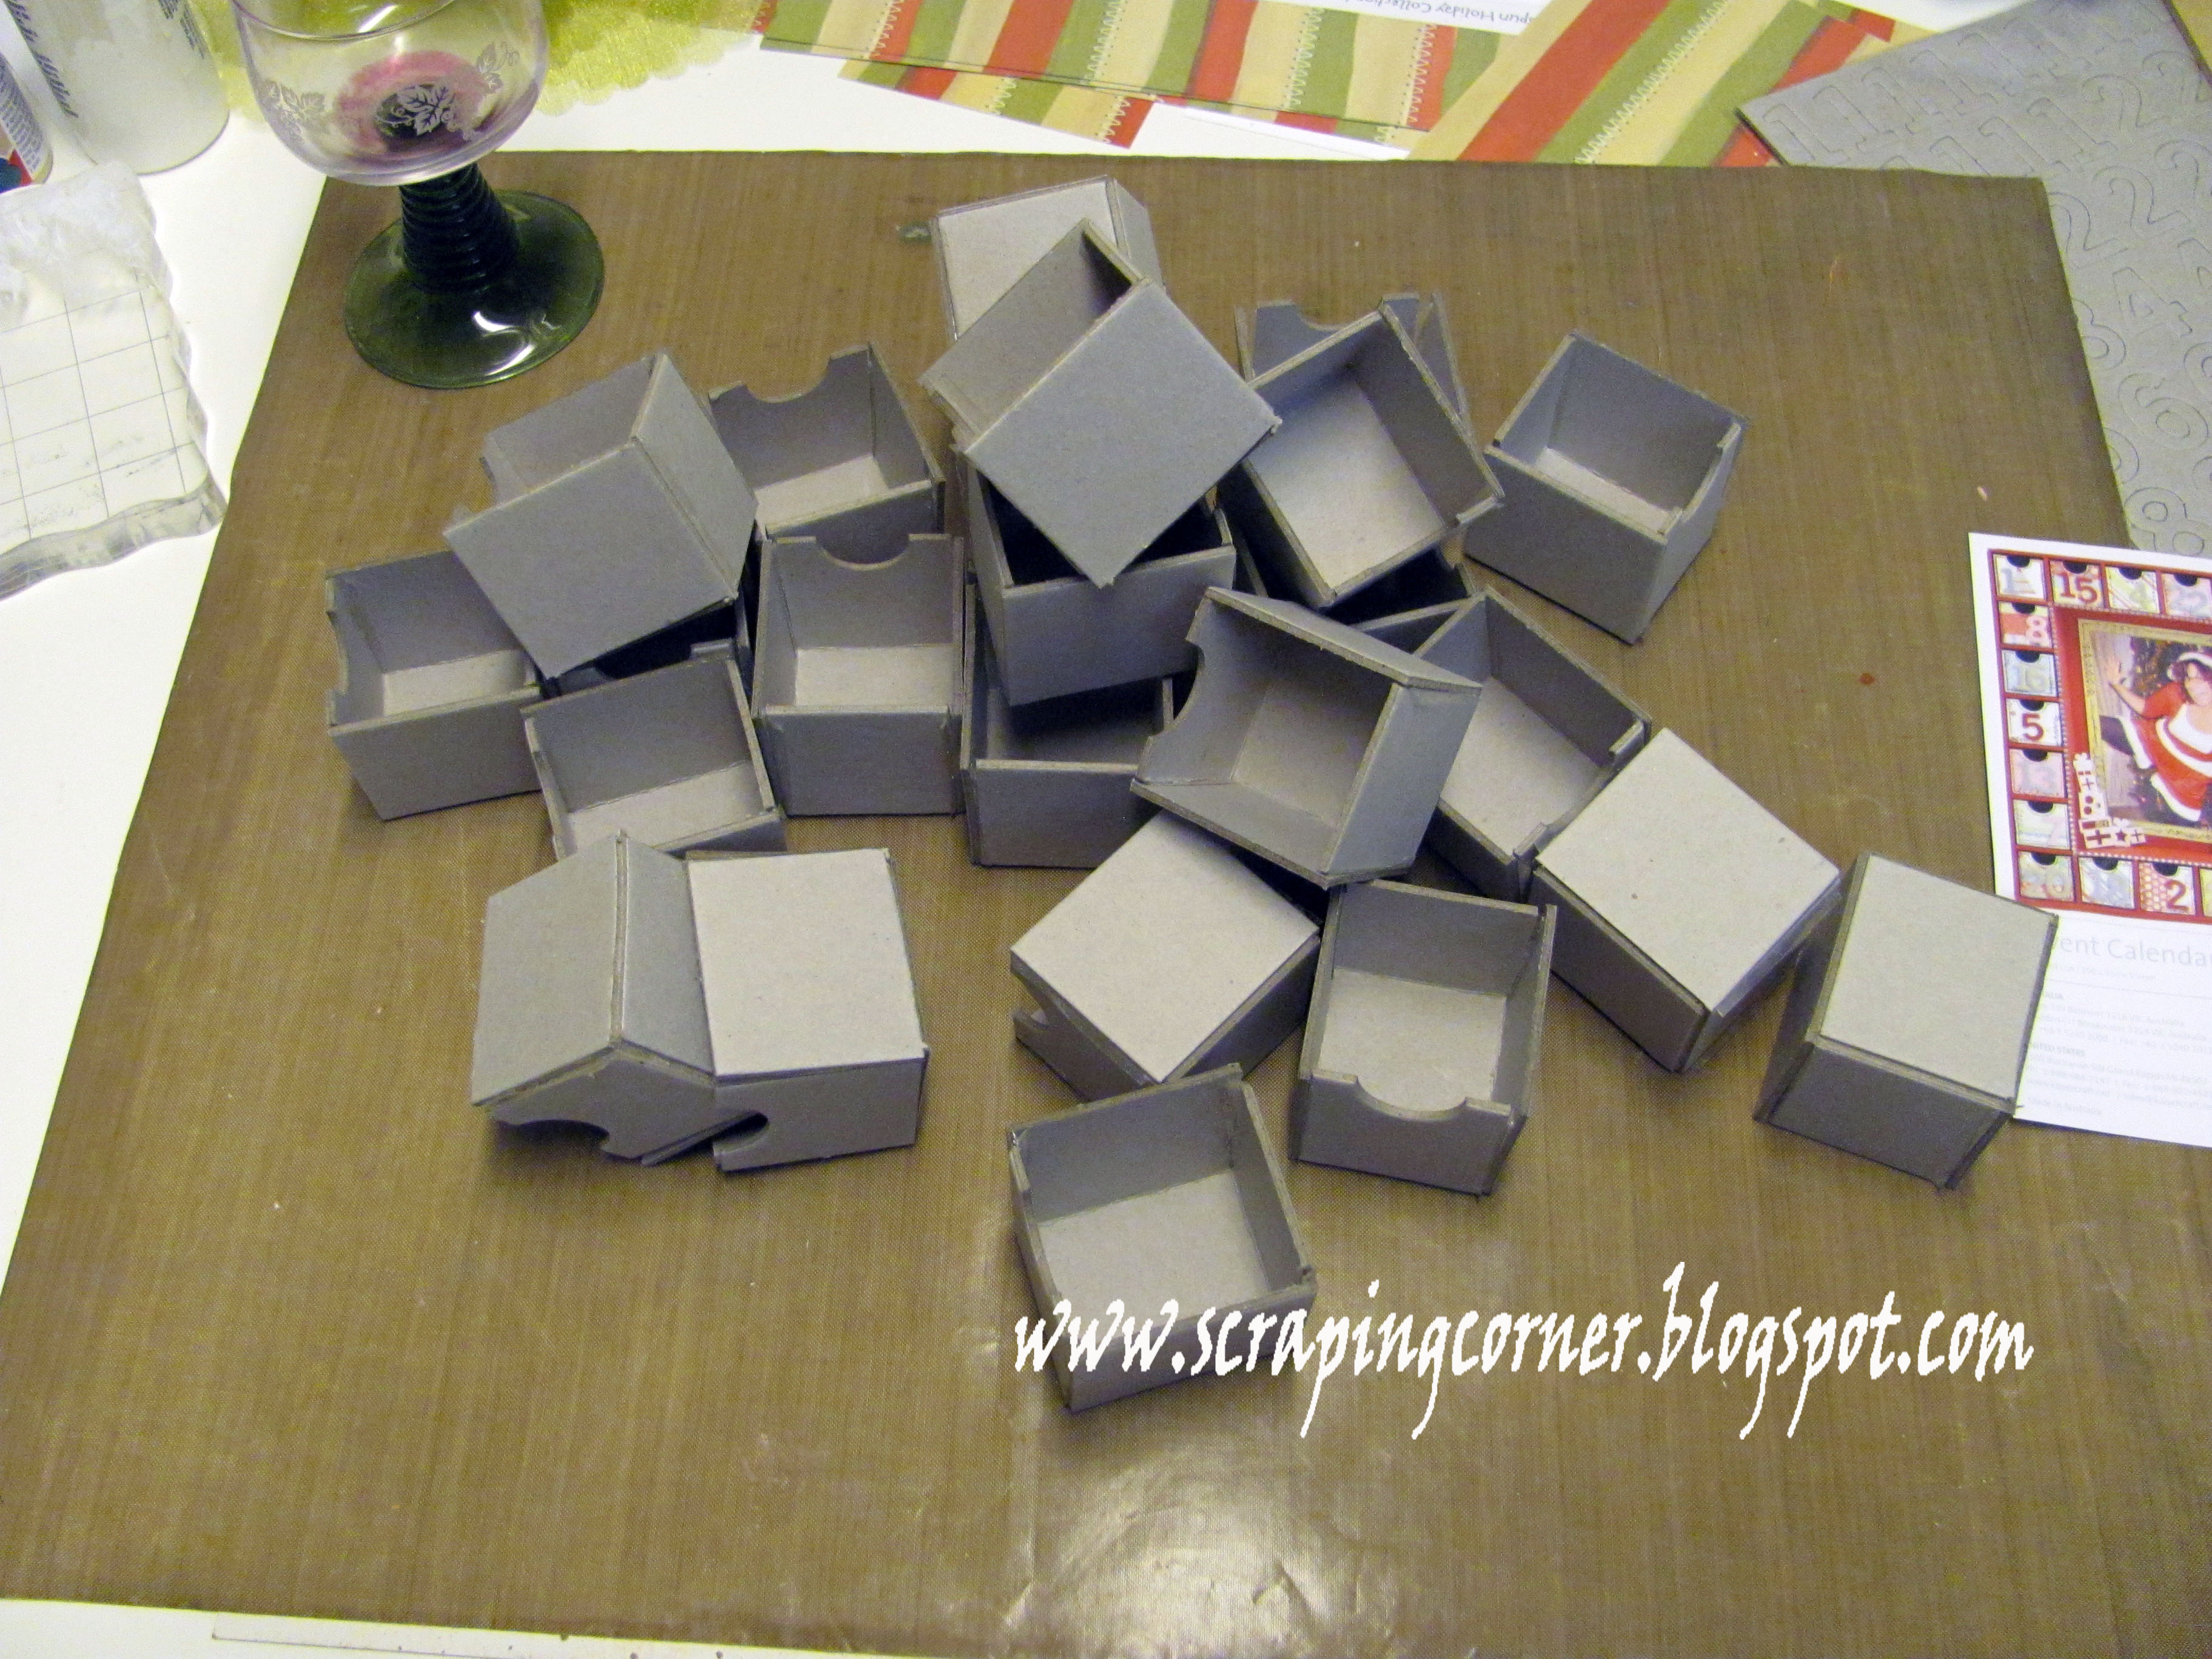
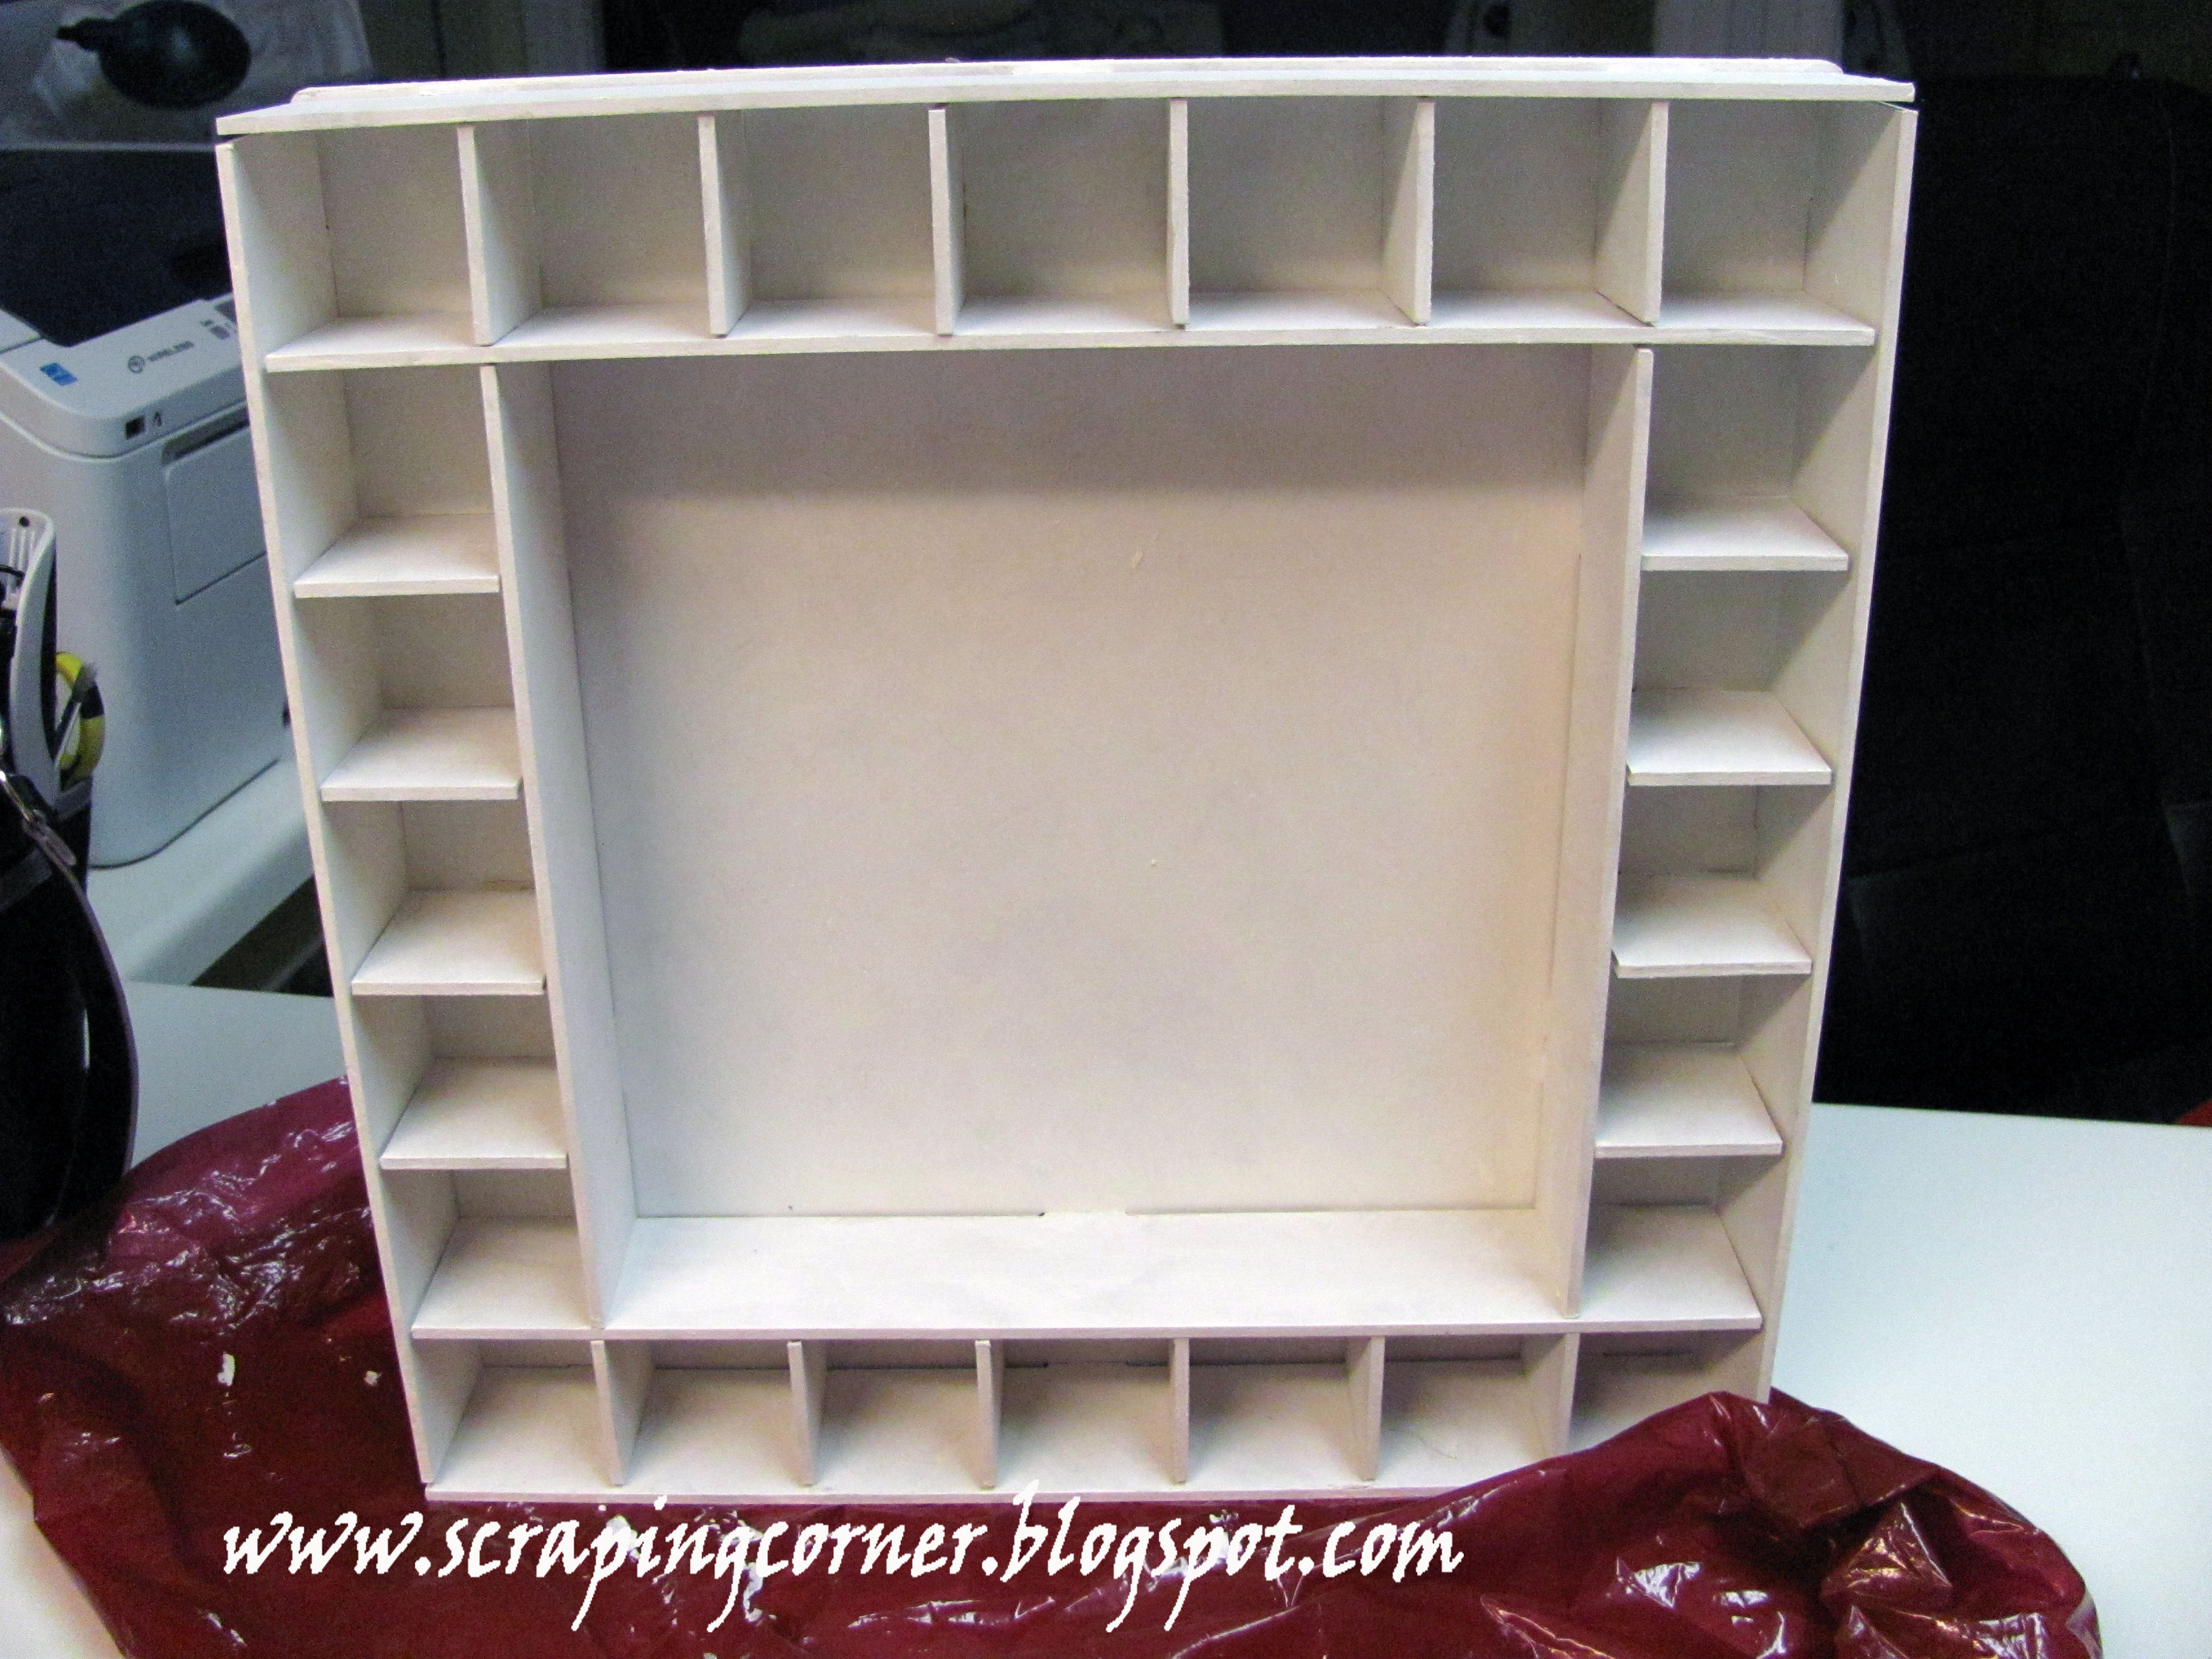
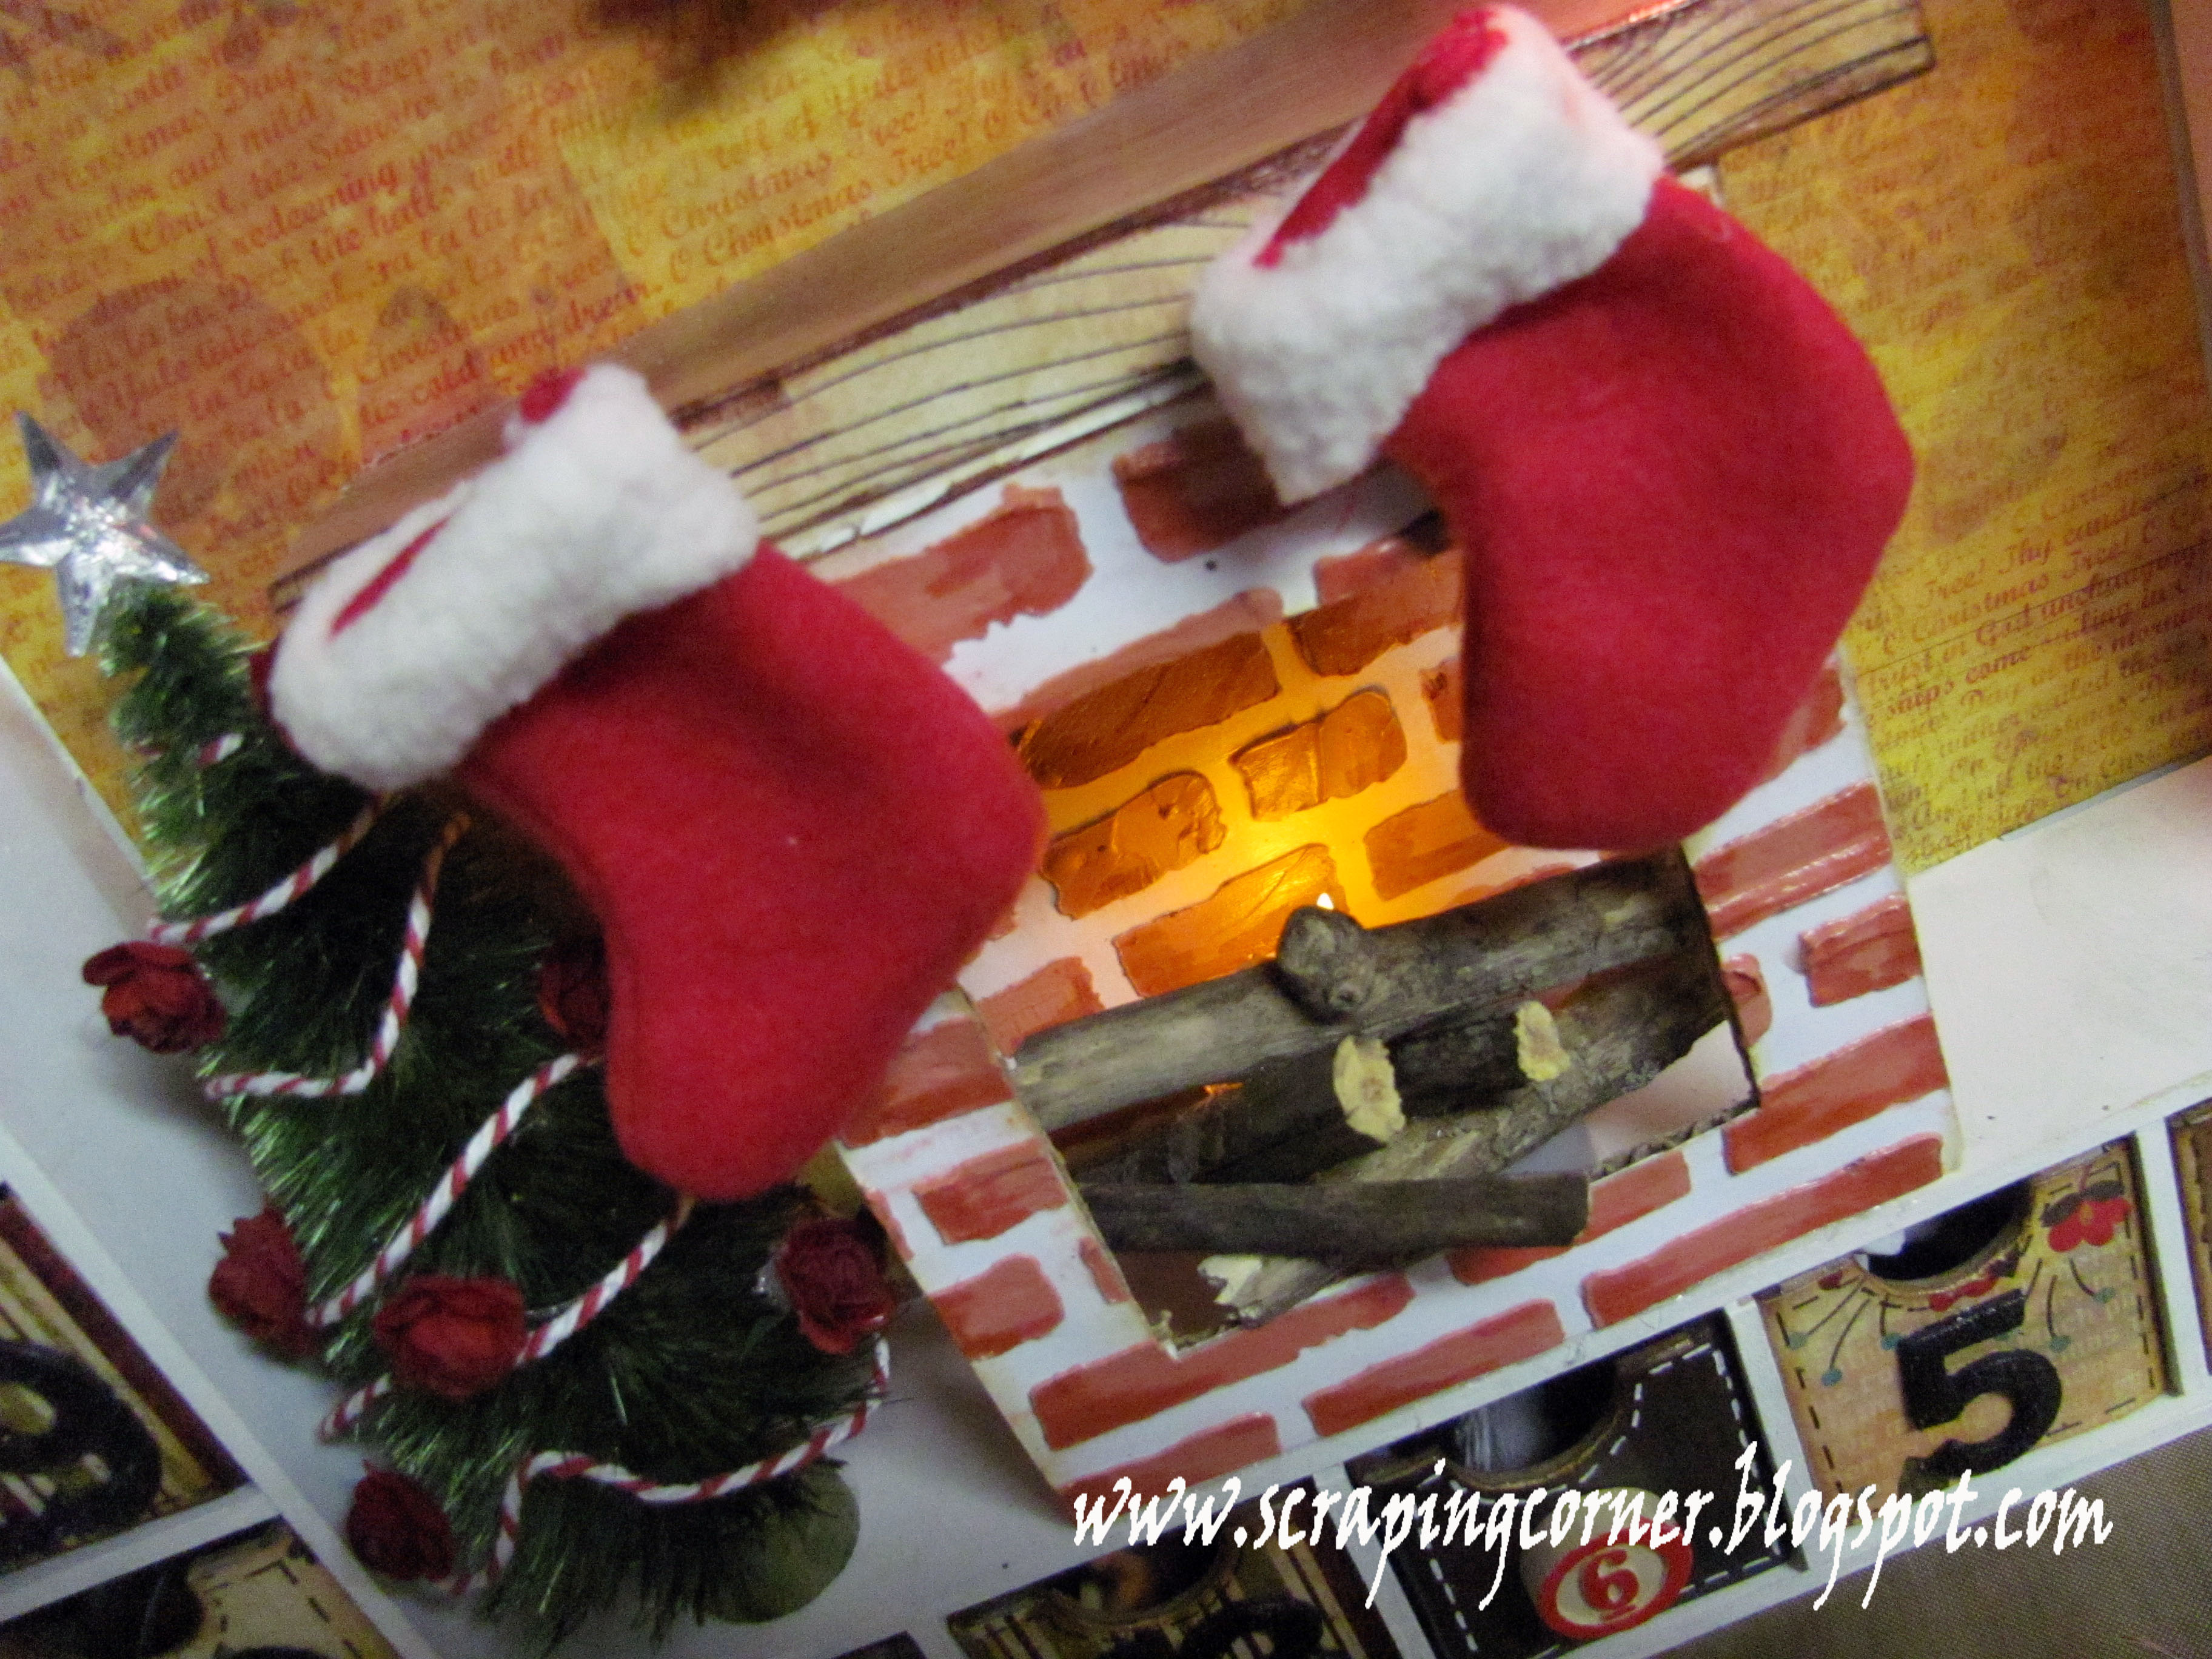
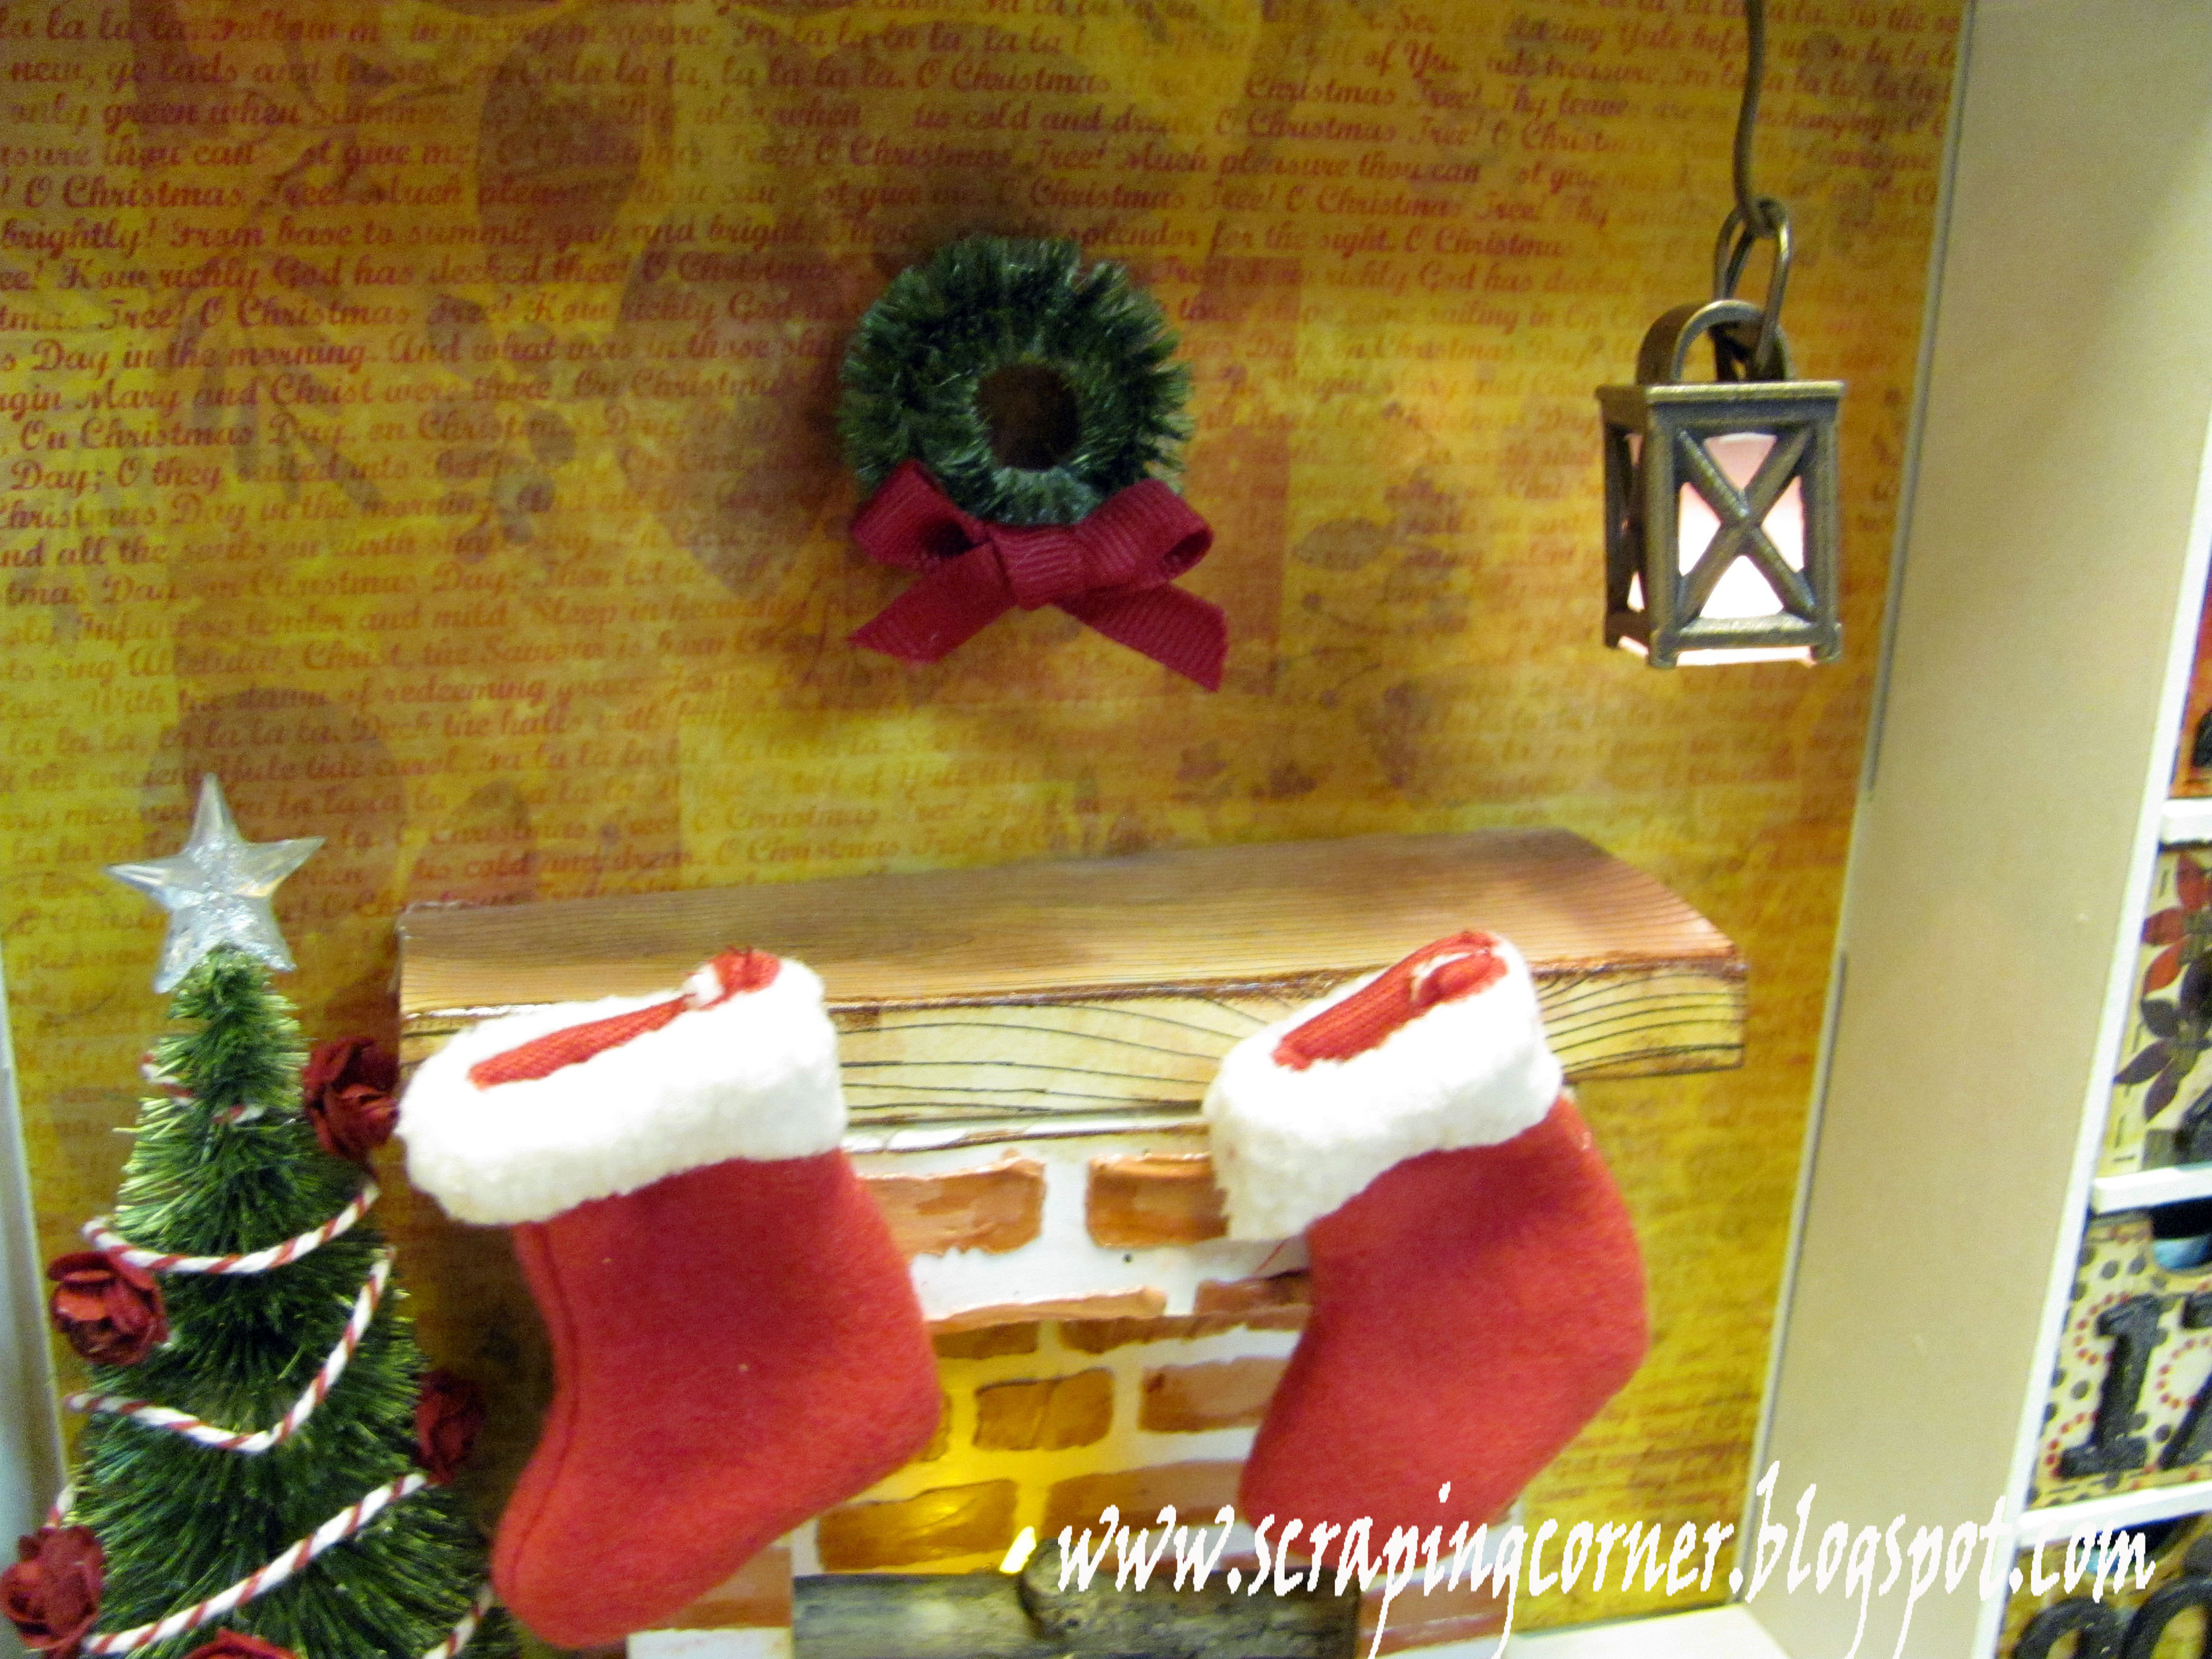
I wanted this calendar to be unique, and timeless.  First I painted all the parts to the box white.  And put the boxes together with Ranger Terrifically Tacky double sided tape.  I wanted to use my favorite Christmas paper line Jovial by Basic Grey.  I created a fireplace with texture paste and gelatoes using a Prima stencil.  I wanted some lighting in the shadow box of this calendar, so I used a flameless tealight and some sticks as logs in the fireplace.  I also used a Tim Holtz mini lantern and his Woodlands collection tree and wreath.  I coloured the tree and wreath with Glimmer Glaze in Dirty Martini.


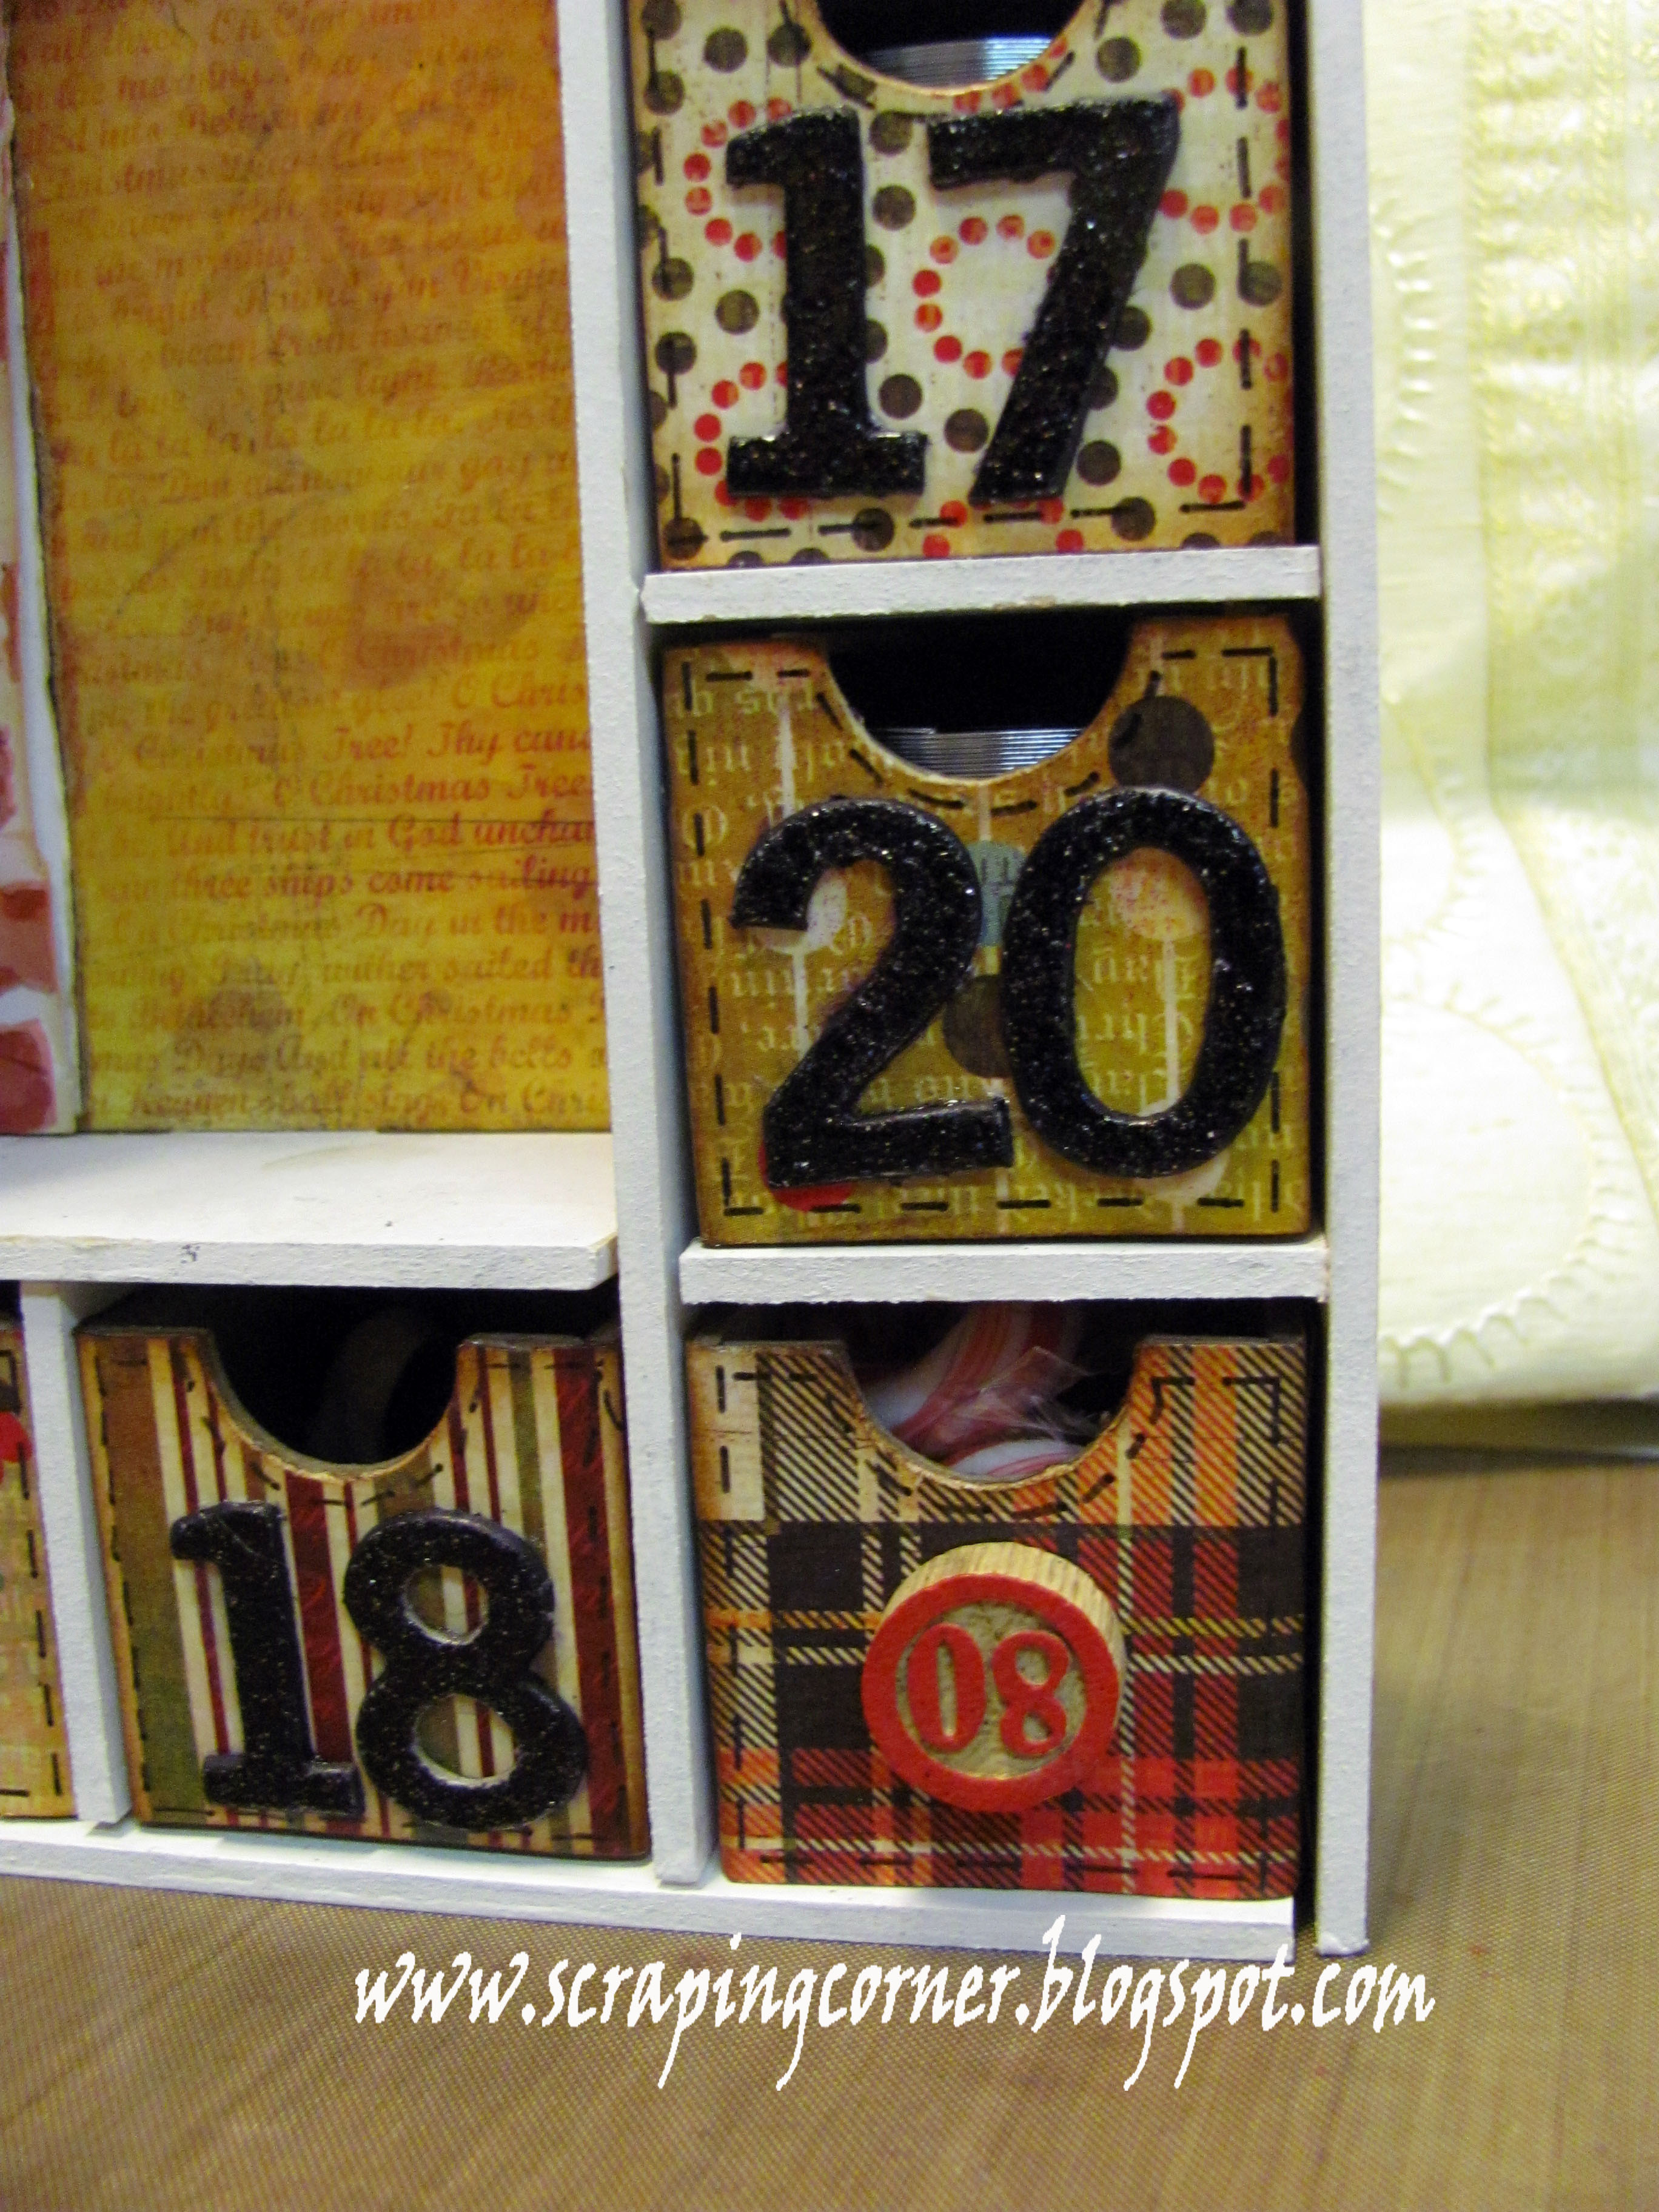
I kept the boxes simple and without too much decoration - so I inked them and put faux stitching on the edges.  I Mod Podged each of the boxes for durability for years to come.  Flowers on the tree are Prima, and the twine is Doodlebug.  The star on the tree is Teresa Collins.  The stockings are Debbie Travis garland!  I replaced some of the numbers with Tim Holtz bingo markers.


A trip to the dollar store to fill the boxes with trinkets, toys and the odd chocolate.  I can't wait to see the look on their faces for years to come when I haul this beauty out with the Christmas decorations!  I loved the process.  Although the building stage could have used more instructions ... and by more I mean ANY!  This kit came only with a photo of the finished product, nothing else. 
 
 
Let me know what you think - be kind become a subscriber and leave a comment.


Sunday, April 29, 2012

A day on the farm

Two summers ago our family went to visit an old acquaintance's organic farm.  My daughter had so much fun playing with the goats, sheep, chickens and other animals.  She had seen most of these animals before, but not up close that she could touch them.  It was a great adventure for sure.


Tina asked me to do some farm layouts with some Kaisercraft Cockadoodledoo collection.  I did another layout with this "this little piggy" see HERE, but I wanted to do something more 'farmish' so I printed a large photo of my daughter and husband in the field with the sheep and washed out the colours a bit.  I cropped down the photo and added two pieces of wooden fence that I had painted with crackle distress paint.  Added a couple of fussy cut sheep and a bit of border punch, a title and this layout was done.  A five minute layout.  It took me longer to blog about it than it did to create it, but I just love it!  Tell me what you think - leave a comment below.

Friday, March 9, 2012

A little Cock-A-Doodle-doo for you!

Kaisercraft has come out with a very different collection in their Cock-a-doodle-doo line, very down on the farm and country.  You would think that me living in the rural place that I do I would have tones of farm photos?  Instead I took the 'little piggy' idea and ran with it and scrapped a photo of my daughter's feet that we had done when she was only a few months old.  I love this photo and it was perfect for what I had in mind ... although I know this is totally NOT what Tina was looking for when she provided me with Kaisercraft's farm papers.  Don't worry Tina, I will do another layout with a farm photo on it for you.
This Little Piggy


For this layout I wanted to keep it soft and girly but keep the focus on the piggy and of course the play on words with my daughter's toes.  I copped a circle in half and added some gathered boarder punch around the edge to look like a lace doily.  I love that banners are back (or did they ever really go out of style?) so I used some VERY old paper from my stash that matched perfectly with the colours I had going on here for the scalloped edge around the banners.  I used some houndstooth paper from the Jillibean Soup Christmas Eve Chowder collection if you can believe that! And look at that, I even fussy cut the cute little piggy - and stuck on a two-holed button to pop up his nose.

Keep your eye on this blog as I will be doing another layout with some actual farm photos from a trip we made to Quebec to visit a friend's organic farm two summers ago.

Wednesday, March 9, 2011

Bo Bunny - Olivia Collection - Layout #2

Another layout using the Bo-Bunny Olivia collection;  This one I didn't title (titles are so over rated sometimes aren't they?)  These photos are taken the same night as my other layout, again they are my sister and this time with my daughter.

I used the Bo Bunny Wraps again, and since I didn't know what to do with the 'leather' trim that they have in the collection, I did a gather stitch on the sewing machine and hoped that it doesn't look too out of place.  I tried two new techniques on some flowers; the flower on the bottom left I'm calling a "water flower" and it is 7 circles punched, then you dampen with a mini-mister of water and make a pleat into the bottom.  I inked with distress ink while still wet, then allowed it to dry.  I then hot glued the petals to the 7th circle overlapping he petals for a dimensional look. I used another of the Kaisercraft wood laser cut flowers, and agian glimmer misted it.  The third flower (coral) was made by using a edge punch and then pleating the paper, again hot glue to hold down the centre and added another circle to the middle for the centre.  I used a new background stamp that I got from Stampin Up just to try it out (wood grain) and I will definitely use that again, I love how it turned out|!|  Some chip stickers and Basic Grey buttons and away you go!


If you want to see either of these Bo Bunny Olivia layouts in person, head on over to Auntie Em's Scrapboooking!

Monday, March 7, 2011

Bo Bunny - Oliva collection

I'm really loving the colours in the Olivia Collection by Bo Bunny.  I've always liked coral and teal together.  Mix in some rusty brown and I'm even happier!  The photo in this layout is of my sister and my son.  I chose to focus in on their eyes.  Both of them have brown eyes - and such a deep brown too.  My husband nor I have brown eyes, but Nigel got his brown eyes from my Father's side of the family - as did my sister.  What a great shot of the two of them!

I used Bo Bunny's Wraps trim in the top, and chipboards. The wooden flower is Kaiser Craft that I glimmer misted.  The letters are Basic Grey. I used my I-rock on the flowers and in the bottom right corner.  The journaling a printed on my computer with Vintage Typewriter font, and I distressed with Vintage Photo ink and Wheatfields gimmer mist.  The button is Bo- Bunny as well, it came on the trim!

The journaling reads:
"Daddy's eyes are hazel, Mommy's eyes are blue, Your eyes are deep brown, Where do you get those eyes?  Ah, Auntie's eyes are the same colour!"


Believe it or not ... the date at the bottom is NOT written in PINK - for some reason the white Signo ink turned pink on this page after I wrote it ... I'll have to remember that if I ever actually do want pink ink!!


Wednesday, January 5, 2011

I Adore You - layout

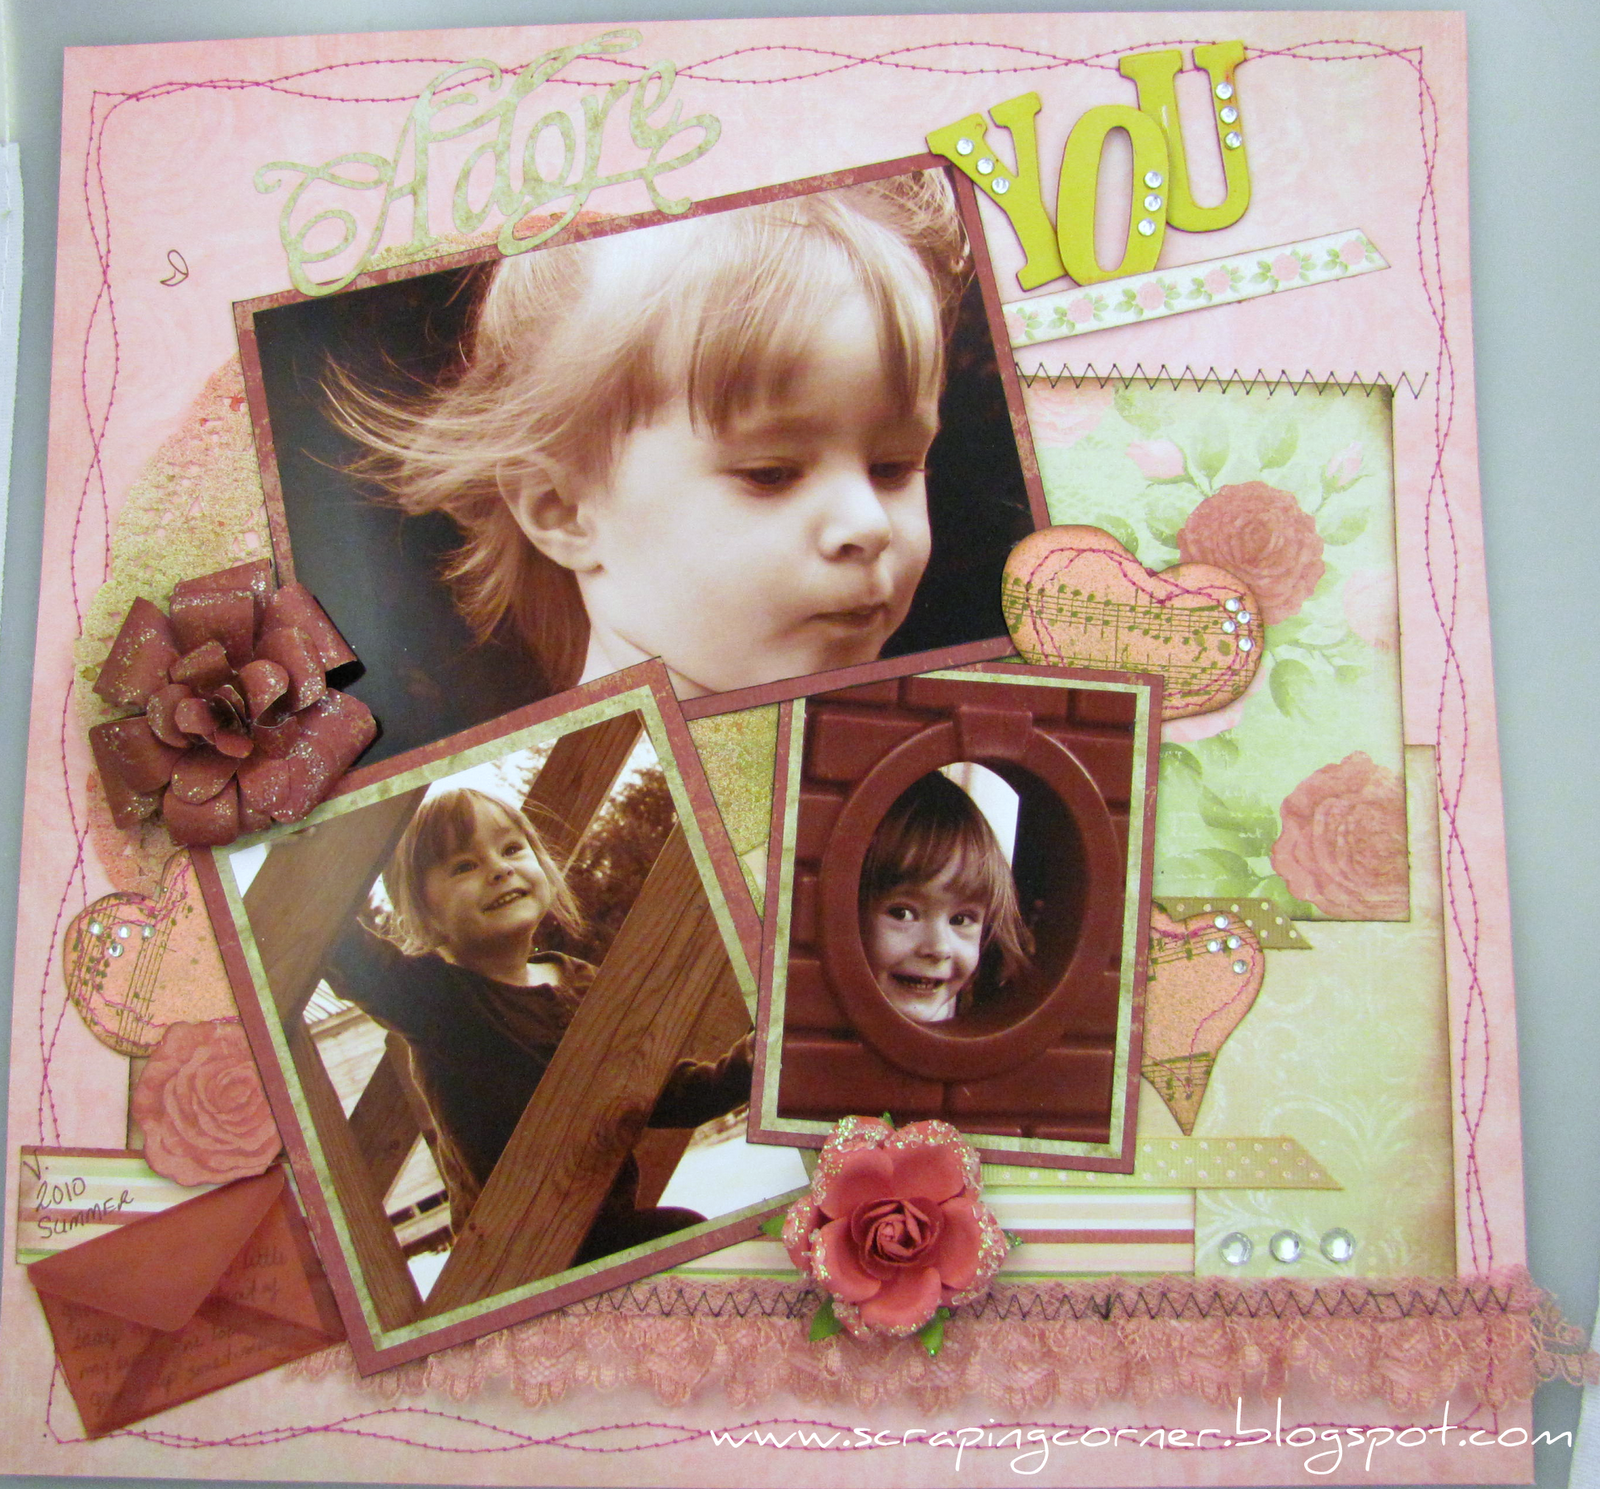
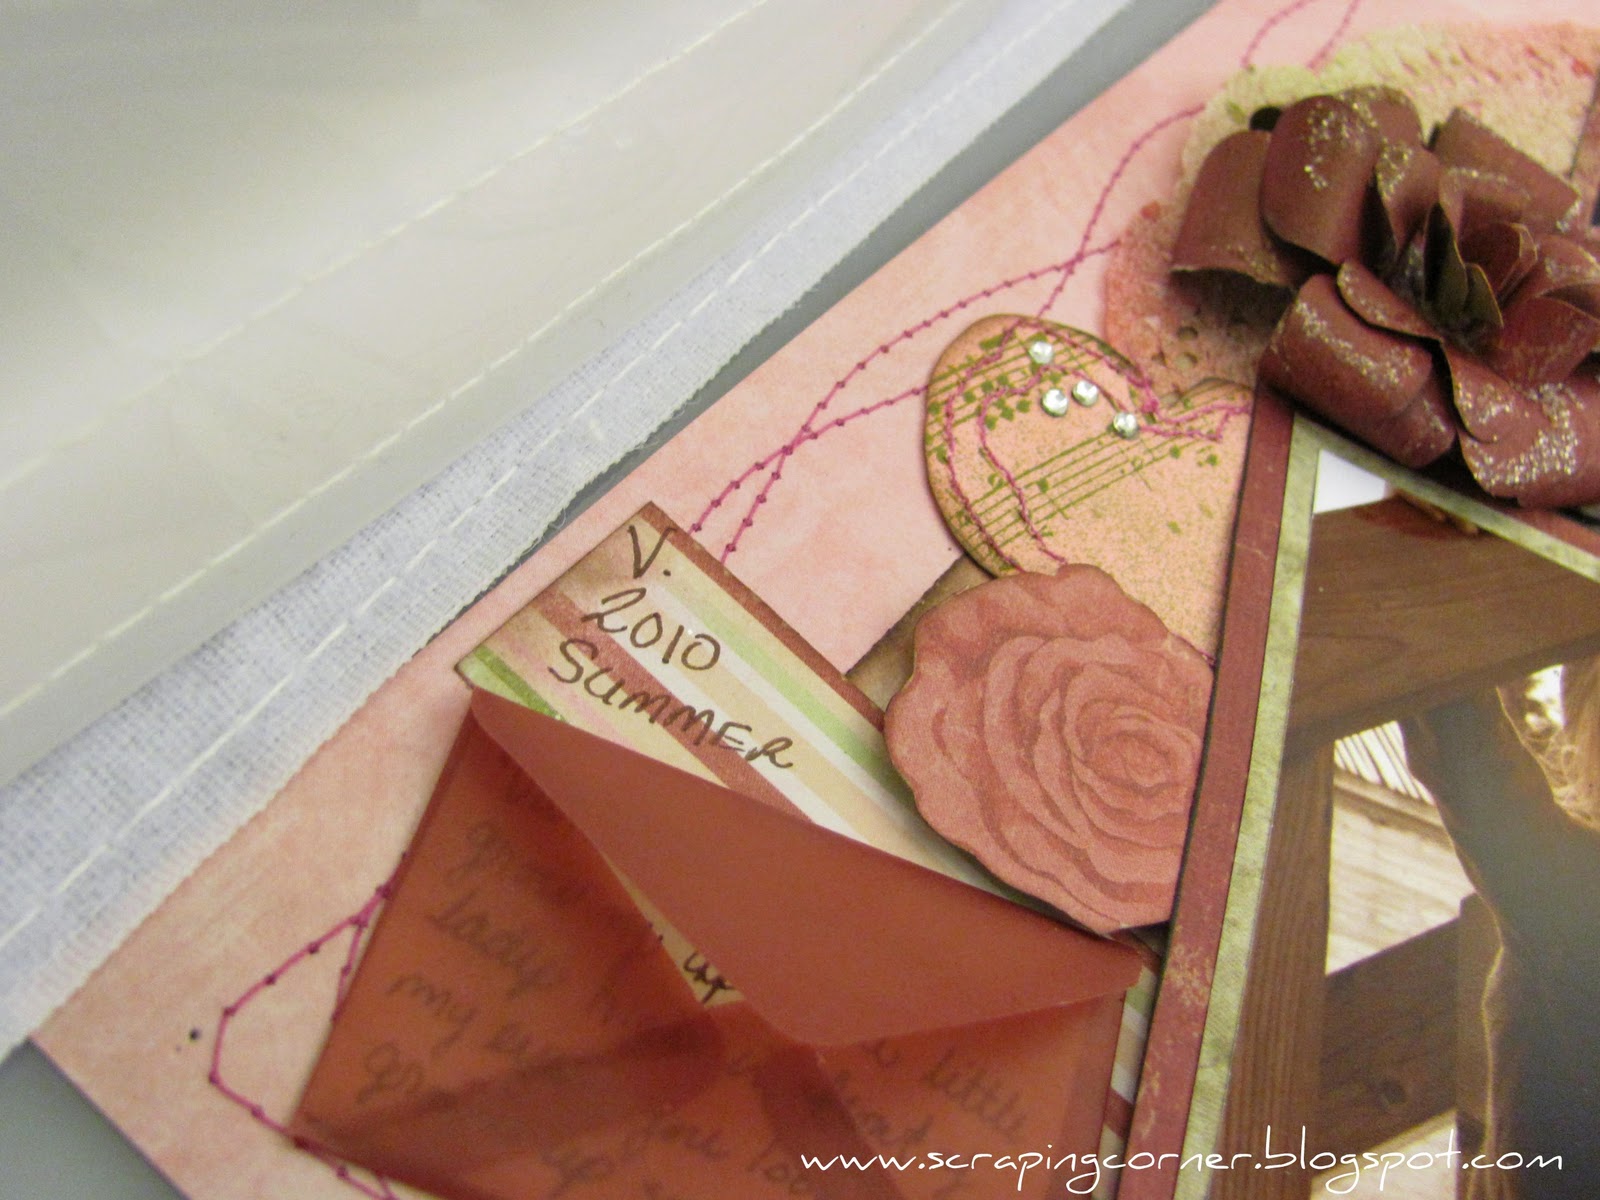
I was at my local Scrapbooking Store when I saw the new line from Ksiser Craft - English Rose Collection ... WOW the colours are so fantastic just begging for a shabby chic spin on them! Dusty rose, faded burgundy, mossy green and ivory ... simply beautiful.  So I purchased a 9 window frame with it and one of each of the pages from their collection.  I started on the frame and will post that project in a later blog post.

I thought I would work with a sketch from Let's Scrap and see what I could do with the Kaiser Craft papers.  Here is the sketch ...
I also wanted to try out my new sewing machine and there was a great deal of stitching on this sketch.  Sew... I stitched and stitched some more.  I'll have you know though, if you glue something down and then try to sew it (i.e. the lace on my layout) it really gums up your needle and jams up the thread ... so just a word of warning, if you intend on sewing, don't put too much glue down first, keep it minimal. 

I made a couple of rough hearts and stitched around the outside of them, and used my new Stampin' Up wheel with Music Notes stamp (loving that right now) I thought I would try my hand at hidden journaling.  I had some little velum envelopes from EK Sucess (had them for about 5 years actually) the hidden journaling reads:
"Vanessa; you are growing up into a little lady right in front of my eyes; you look so grown up sometimes!!"


I used the Home Decor Cricut cartridge for the word "adore".  I used a prima Tea Rose - in Santa Rosa (this is one of the ones that I won a few months back) it worked perfectly (it is the little one on the bottom; I handmade the larger one on the left at the top).  I also glimmer misted a paper doily using Olive Vine and Viva Pink and misted some of the hearts and ribbons with the same.  I used my I-Rock for the first time on this ... not sure if I'm liking it or not (I know, Mandy, you love yours) but I am having a hard time getting the jems into the positions that I want, and keeping them there until I weld them down.  Any tips??


Let me know what you think of the layout, does it look anything like the sketch?

Total Pageviews

LinkWithin

Related Posts with Thumbnails