side bars

Tuesday, December 28, 2010

My new toy!!

Well I'll tell ya, Christmas was great this year!  My husband bought me a new toy .... do you know what it is??


I also got a new scrapbooking box, an I-rock, and a mini sewing machine.  I think I may still buy a semi-decent new one for myself.  Not sure if this little one is going to do the trick or not, but we will see.

I also made a new card, this comes directly inspired from a card that was sent to my sister for Christmas from her friend Rae-Lynn in B.C.  I loved the card so much I asked her if I could 'lift' it!  She sent me a link to a blog post tutorial on this card - here is that link http://www.stampingvideos.com/2008/10/origami-christmas-trees.html

That's it for now folks, let me know what you think of my new toy ... leave me a comment as to what you believe it is!

Monday, December 20, 2010

Stampin Up Starter Kit Cards Contest

I made these two cards for a contest going on at Stampin' Up. You have to use ONLY the contents of your starter kit. It seems as though there is a lot of controversy over that though. I guess the kit has changed over the year, and others didn't know that you could customize the kit to contain patterned papers and ribbons ... well I figured it out, and I must say that I think I did alright.  They are picking five winners and each winner will get to pick a stamp set ... how cool would that be? 

I tried to throw a few techniques in there too.

For my first card, I distressed up the edges of the paper, I used my scissors on this one, but normally I would have used my Tim Holtz distresser (which Stampin' Up does sell, however it didn't come in the kit)  I also used my Chocolate Chip ink refill to dye my lace ribbon.  And as you know I love to ink the edges of absolutely everything, so I used the sponge that they provided in the kit. The colours I used are More Mustard and Chocolate Chip and the stamps that I used are from Word Play and Sense of Time collections.


The second card - and my favorite of the two - I used an embossing relief technique and my brand new Stampin' Wheel - loving that thing!  I used again the More Mustard and Cherry Cobbler this time.  What a combination I know!  After embossing with clear embossing powder and Versa Mark ink, I put the More Mustard ink on my craft mat and sprayed it down with water and ran the card through that.  After allowing it to dry I sponged on some Cherry Cobbler ink into the spots that were shy of ink for a little depth.  I love the way it turned out.  Then I used the Elizabeth stamp and two stamps from the Vintage Vogue collection for the sentiment.  I tore spiral circles and inked them for the flowers.  I will do a tutorial on spiral flowers soon on my blog; they are fun and easy to do. 

Thursday, December 16, 2010

Christmas cards & Vintage Tags

So ... what have I been doing with my time recently you ask?  Well I've been making all my Christmas cards, and tags ... I'm too cheap to buy them LOL!

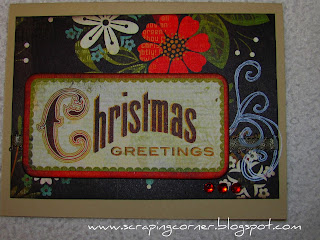
I used a Basic Grey card kit and made a few of my own from the Jovial line.


I made my tags with my Cricut using the Plantin Schoolbook Tag1 at 3 1/2 inch and used a Bo Bunny stamp with Tim Holtz Distress ink in Peeled Paint, then distressed the outside with Worn lipstick distress ink.  I stamped with a Hero Arts snowflake using Stampin' Up Craft in in Whispter White and finished it off with a piece of twine for the tie.

I hope you enjoyed these.

Wednesday, December 8, 2010

Echo Park - Merry Christmas - stocking

Well hello there! 

I got the chance to work with the new Christmas collection pack from Echo Park - Merry Christmas.  I just love the traditional colours of mossy green and deep russet red, when they threw in some chocolate brown I was ... well, tickled pink!  I absolutely adore the music sheets there are in this collection.  I have so many plans for them. 

In the meantime I put together this little stocking project.  With a little gingerbread man escaping down from a dangling ornament. 


I created the stocking with a blanket stitch all the way around the perimeter and added the toe and heal in a contrasting green polka dot, and used a crimper on some plain white cardstock to add some texture for the top. 

I couldn't find a perfect match to the mossy green in the stickles that I had, so I mixed bronze, green and black together and painted it onto the edges of the holly leaves.  I added some red stickles and red gems to the berries of the holly. 

I used Glossy Accents on the candy canes to give them a shine like real candy.  The gingerbread man is traced with glitter and accented with brads for his eyes and buttons. 

I wanted to make the Christmas ornament pop, so I used a technique that I've done before when making pumpkins at Halloween, by cutting strips of patterned paper and gathering at the top and bottom with a brad and then spreading the strips apart to form a half ball.  This technique works well with ribbon too!

Thanks for looking and come back any time!

Total Pageviews

LinkWithin

Related Posts with Thumbnails