side bars

Showing posts with label stitching. Show all posts

Thursday, June 14, 2012

Its all Fun & Games .... until?

Page Maps - June featuring Echo Park - This & That
Wow, I loved this collection from Echo Park - This & That.  I'm not one to usually fawn over Echo Park, but they have really come a long way in the last two years from their infancy stages, very impressed I was with this collection.  I loved the colour collection of the browns, yellows and teal green.  I loved the boy theme to it, and all the wood grain!

So, this is me at Casino Rama in Orillia Ontario - my friend got tickets to see Sheryl Crow and we decided to 'make a donation' at the casino afterwards - great times!  The arms raised in the air was from a commercial that Casino Rama was re-running over and over - I guess you had to see it to understand.


The theme to this month was sewing - I've employed 3 different types of stitching - I used my machine to stitch down the middle, I hand sewed in a blanket stitch  the pocket and I did some faux stitching on the arrow and again across the middle.  I layered some Prima flowers and coloured the naked chipboard arrow with the new Spring Distress ink in Peacock Feather - love that colour!!  I had alot of story to tell with this layout, so I decided to tuck a journaling card into the pocket.

Leave me a comment about your favorite time at a Casino - did you win big?  Or just leave $60 richer like I did?

~Lorena~


Monday, January 17, 2011

Seasonal Kit from Tina's Scrapbooking Creations - Winter layouts (3)

Well, Tina stumped me again with her various patterned papers in her Seasonal Kit, a grand mix of Echo Park, Little Yellow Bicycle, Bo Bunny, Creative Imaginations and some little trinkets.

Well, here is what I have come up with so far, three layouts, and started my fourth.

The first I will call Yuletide Carols;
Using the Little Yellow Bicycle paper as a title for this one, I used my clear embossing technique with a roller stamp that I have from Stampin' Up for the music notes on the background.  I stitched around the outside edge (told you would see more stitching from me!) I covered a chipboard tag from the kit and used the ribbon from the kit to complete it.  The journaling reads
"With their eyes all a glow... You guys enjoyed that electronic piano that Daddy got you for Christmas SO MUCH! Hours of fun tickling the ivory! Nigel & Vanessa Dec. 27th 2010"


The second I am calling Waiting...
OK, Tina is going to kill me over this one, but I absolutely hated the Little Yellow Bicycle paper that she put in there, it is full of Christmas sayings, some of it in metallic red foil print ... so what did I do with that paper?  Aside from the odd little word here or there that I cut out and used for titles etc.  I flipped it over and used the white backside and glimmer misted it!  I cut out some of the ornaments from the Creative Imaginations paper and the trees from the same line, and used pop-dots to give it some dimension.  This is my absolute favorite photo this Christmas, and it wasn't even taken by myself, it was taken by my sister.  We must have taken 100 photos that day, and this was the best we got!  I used Glossy Accents on the title to make it pop.  No stitching on this one, but I did dashed lines to look like stitching.  The journaling reads
"Patiently waiting for Santa Vanessa 2010"


The third I am calling Frosty The SnowDUDE; it is based on a sketch by one of Tina's designers Jill Sarginson.  You know me and circles, I love them!!  I kept this layout pretty tone on tone with the blues and browns from the kit. More stitching around the border.  I tried to give this layout some dimension by making the snowflakes in layers.  I glimmer misted the backside of the LYB paper again for the inside of the snowflakes.  I put my Big Shot to use with a snowflake embossing folder in the smaller blue circle.  I used Glossy Accents again on my title to make it stand out.  The journaling reads
"Daddy helped Vanessa  build a SNOW DUDE! Complete with a MOHAWK!! December 2010"

Wednesday, January 5, 2011

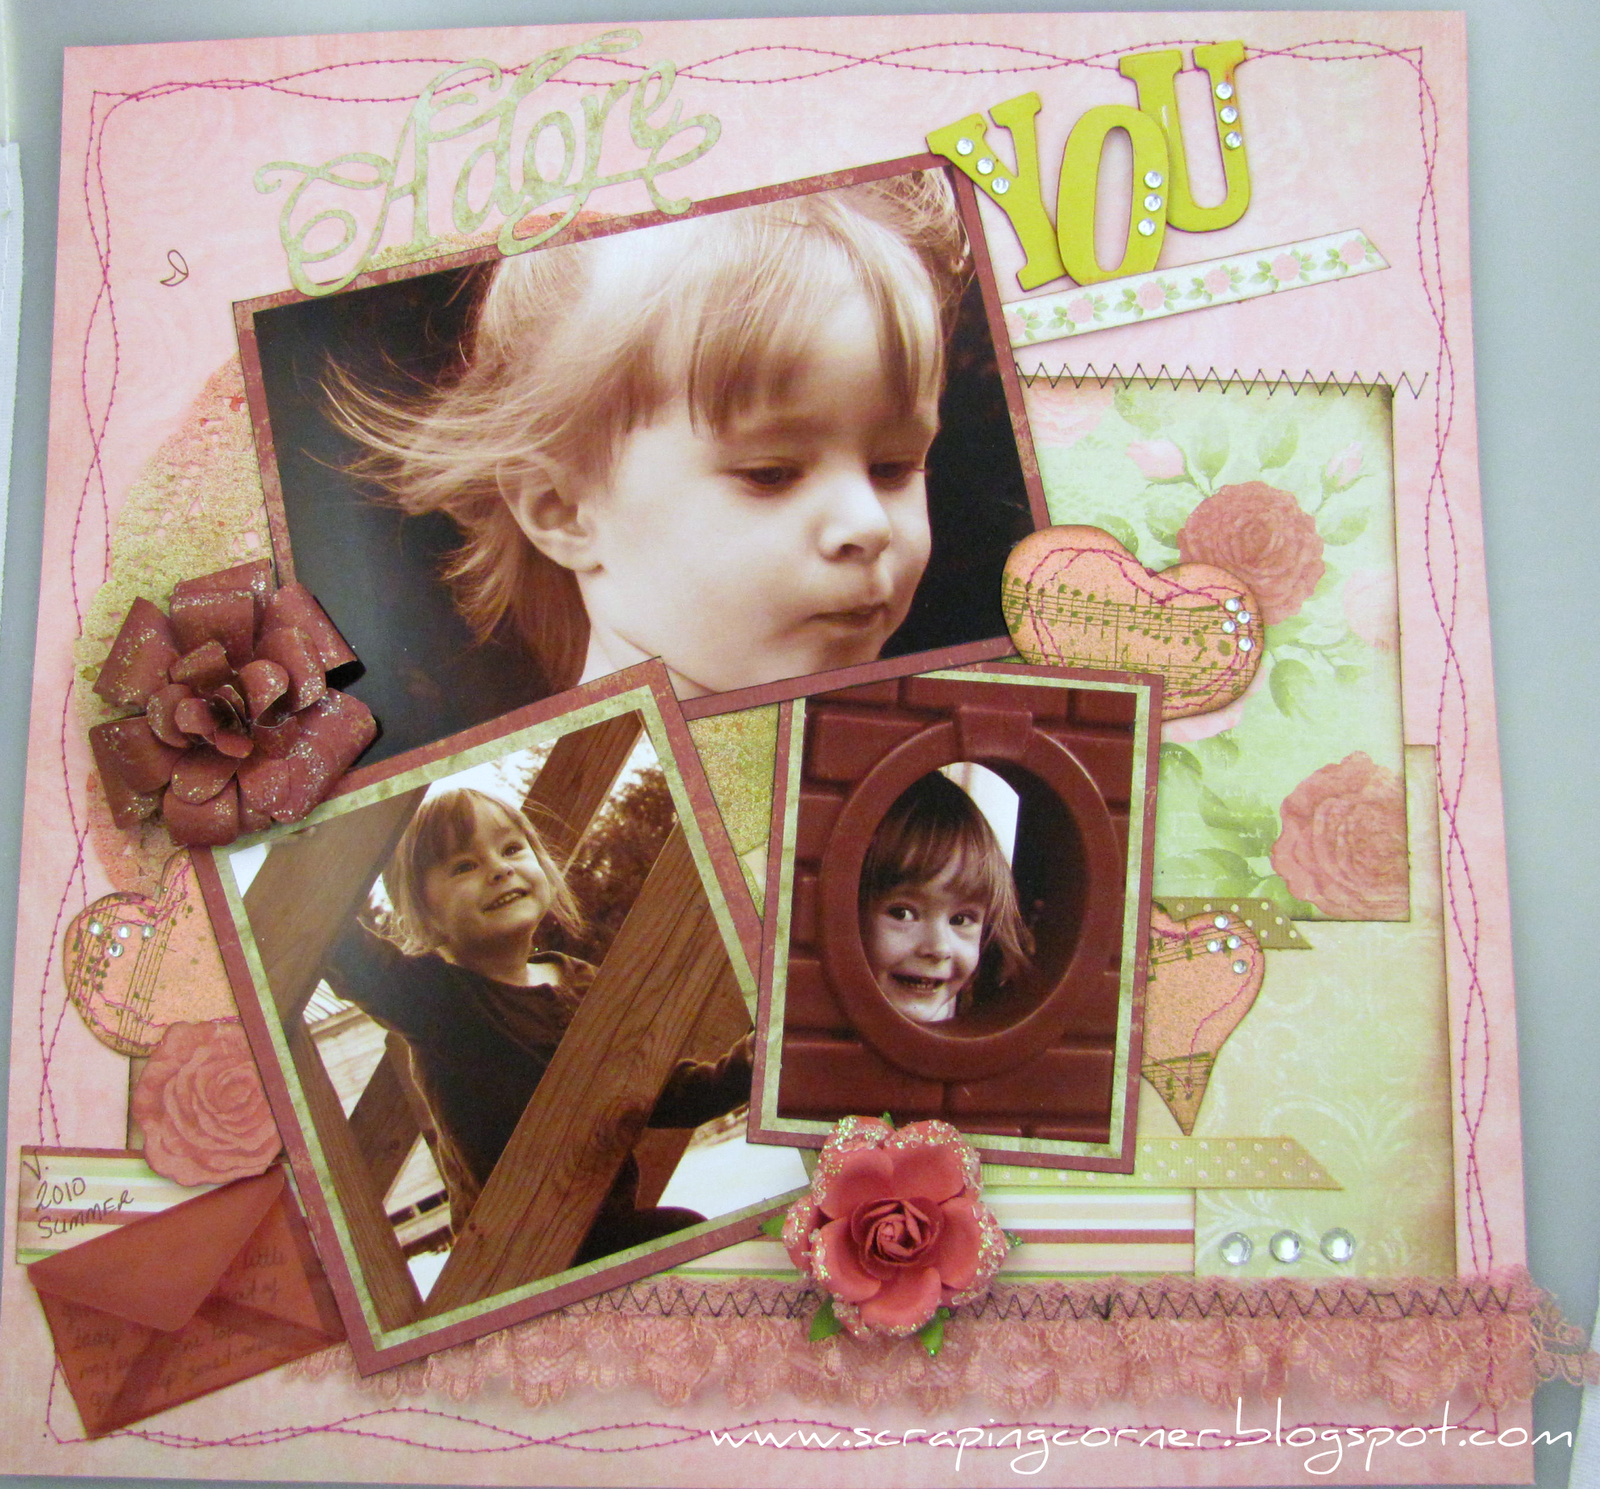
I Adore You - layout

I was at my local Scrapbooking Store when I saw the new line from Ksiser Craft - English Rose Collection ... WOW the colours are so fantastic just begging for a shabby chic spin on them! Dusty rose, faded burgundy, mossy green and ivory ... simply beautiful.  So I purchased a 9 window frame with it and one of each of the pages from their collection.  I started on the frame and will post that project in a later blog post.

I thought I would work with a sketch from Let's Scrap and see what I could do with the Kaiser Craft papers.  Here is the sketch ...
I also wanted to try out my new sewing machine and there was a great deal of stitching on this sketch.  Sew... I stitched and stitched some more.  I'll have you know though, if you glue something down and then try to sew it (i.e. the lace on my layout) it really gums up your needle and jams up the thread ... so just a word of warning, if you intend on sewing, don't put too much glue down first, keep it minimal. 

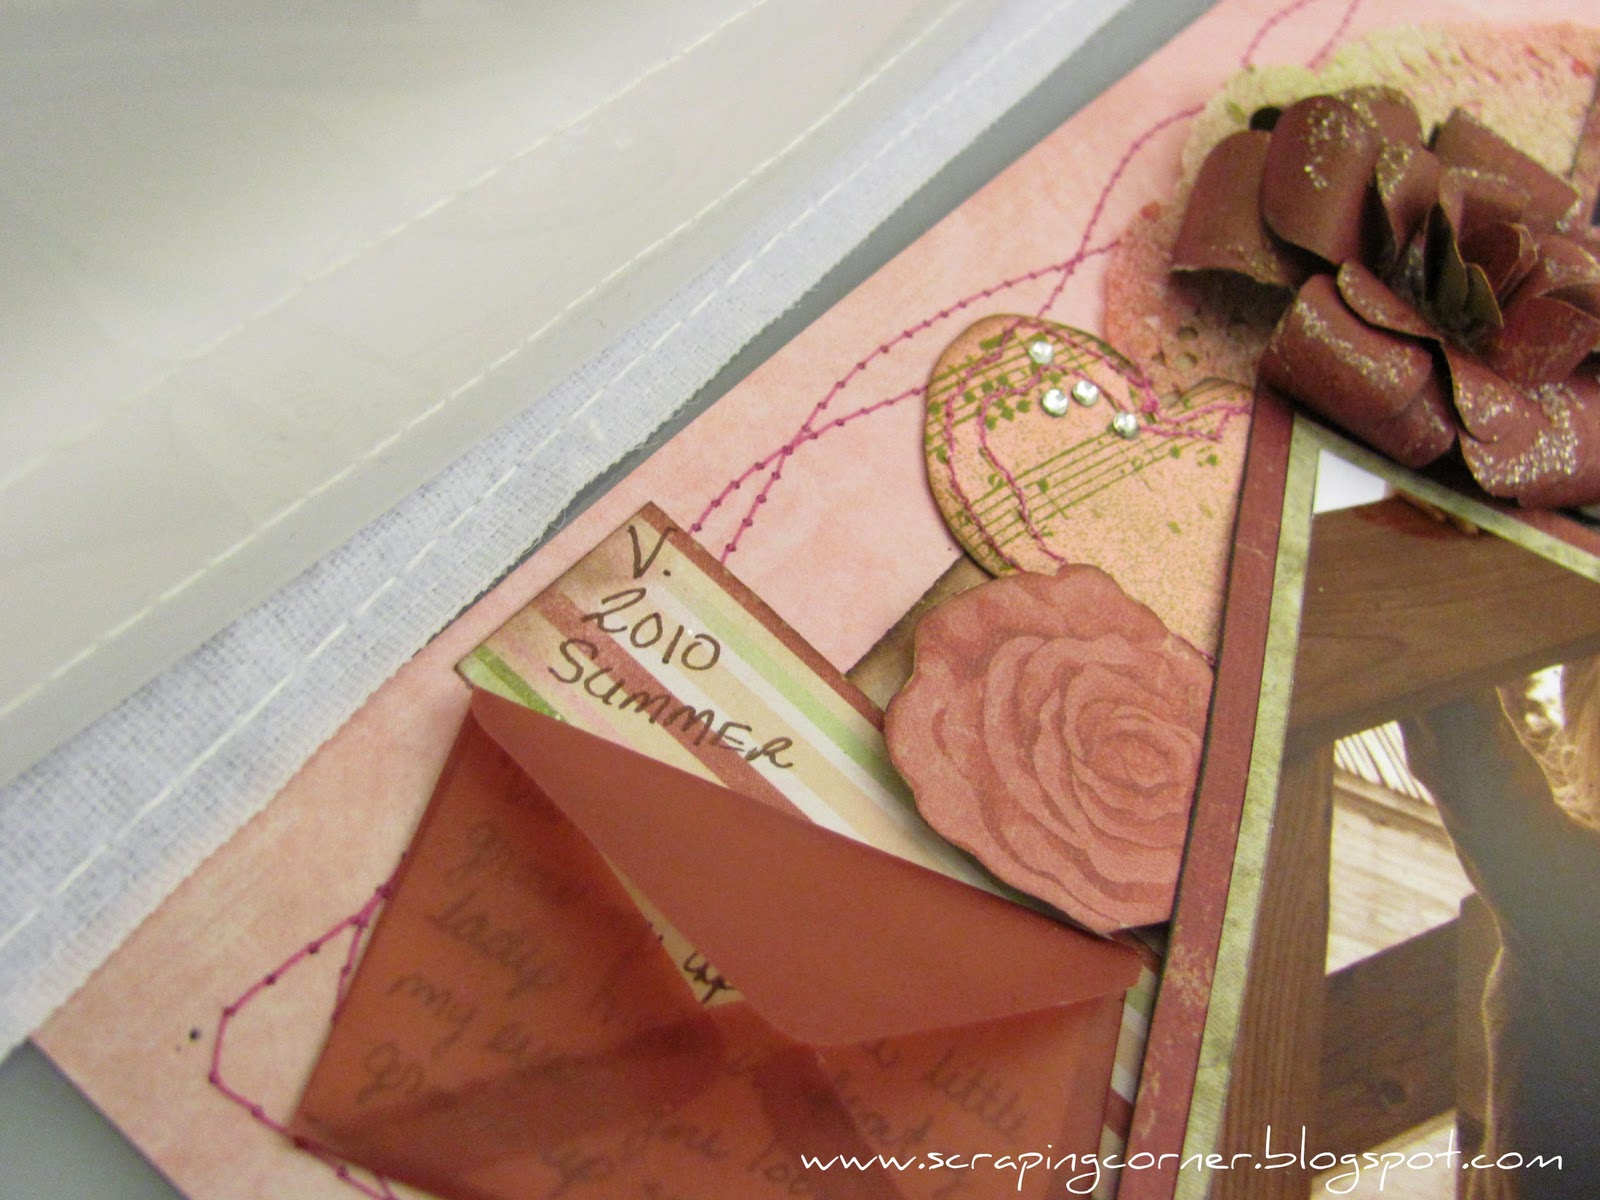
I made a couple of rough hearts and stitched around the outside of them, and used my new Stampin' Up wheel with Music Notes stamp (loving that right now) I thought I would try my hand at hidden journaling.  I had some little velum envelopes from EK Sucess (had them for about 5 years actually) the hidden journaling reads:
"Vanessa; you are growing up into a little lady right in front of my eyes; you look so grown up sometimes!!"


I used the Home Decor Cricut cartridge for the word "adore".  I used a prima Tea Rose - in Santa Rosa (this is one of the ones that I won a few months back) it worked perfectly (it is the little one on the bottom; I handmade the larger one on the left at the top).  I also glimmer misted a paper doily using Olive Vine and Viva Pink and misted some of the hearts and ribbons with the same.  I used my I-Rock for the first time on this ... not sure if I'm liking it or not (I know, Mandy, you love yours) but I am having a hard time getting the jems into the positions that I want, and keeping them there until I weld them down.  Any tips??


Let me know what you think of the layout, does it look anything like the sketch?

Total Pageviews

LinkWithin

Related Posts with Thumbnails