side bars

Sunday, January 9, 2011

Wanna Peek?

I'm working on some layouts from the Seasonal Kit from My local Scrapbooking store, and I have some little final touches to add before I will reveal them here.  But here is a sneak peek until then.

Layout# 1

Love clear embossing and my Stampin' Up wheel! Wait for it ... do you see it ... more stitching LOL!!


Layout #2
Ohh ... it's that such a fantastic photo? I'm so excited to show this one off to you and tell you what I used for the background!!

I have two more that I am working on too ... yup, Tina, I did it again, four layouts and still LOTS of left overs!!

Wednesday, January 5, 2011

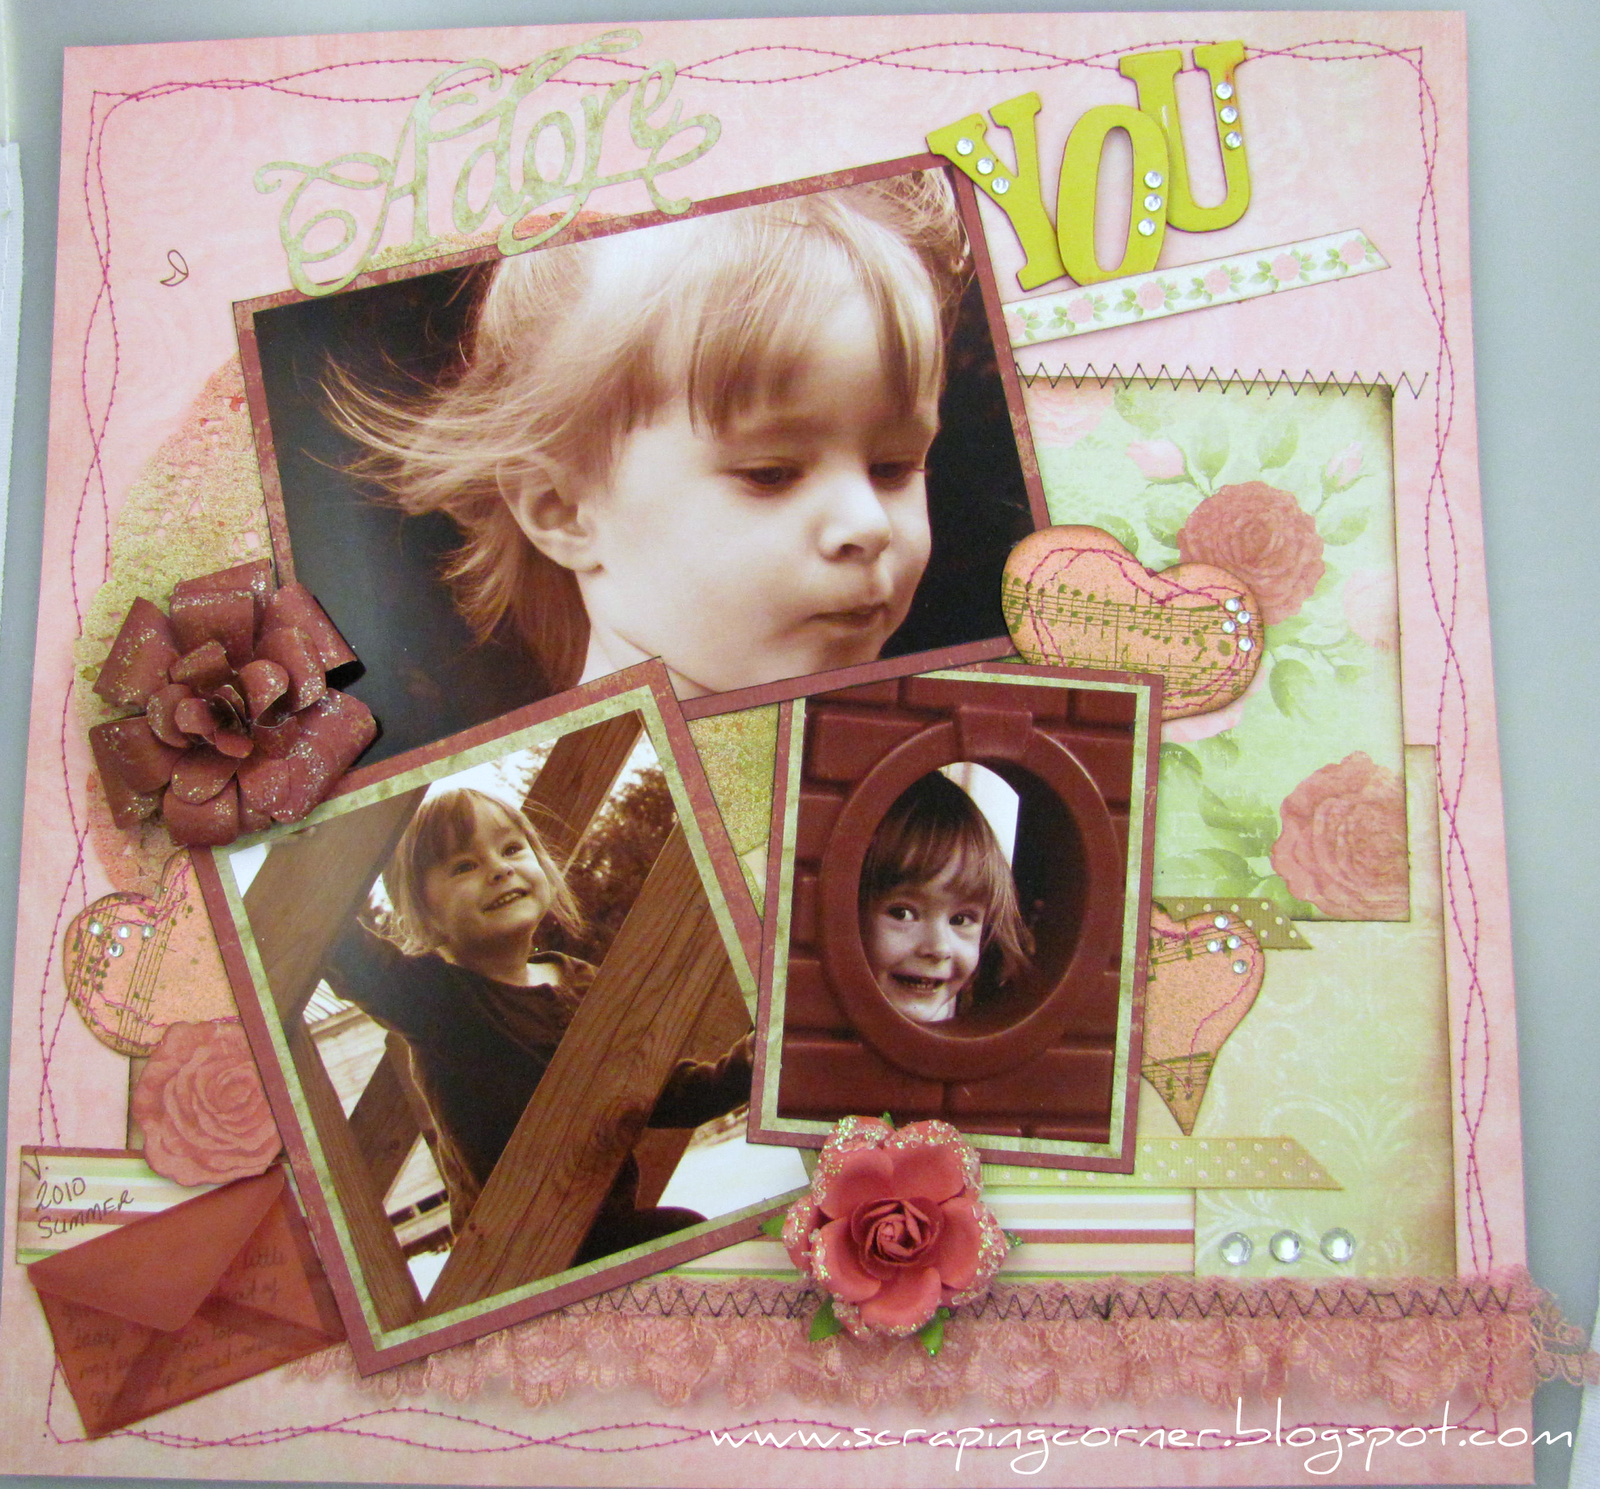
I Adore You - layout

I was at my local Scrapbooking Store when I saw the new line from Ksiser Craft - English Rose Collection ... WOW the colours are so fantastic just begging for a shabby chic spin on them! Dusty rose, faded burgundy, mossy green and ivory ... simply beautiful.  So I purchased a 9 window frame with it and one of each of the pages from their collection.  I started on the frame and will post that project in a later blog post.

I thought I would work with a sketch from Let's Scrap and see what I could do with the Kaiser Craft papers.  Here is the sketch ...
I also wanted to try out my new sewing machine and there was a great deal of stitching on this sketch.  Sew... I stitched and stitched some more.  I'll have you know though, if you glue something down and then try to sew it (i.e. the lace on my layout) it really gums up your needle and jams up the thread ... so just a word of warning, if you intend on sewing, don't put too much glue down first, keep it minimal. 

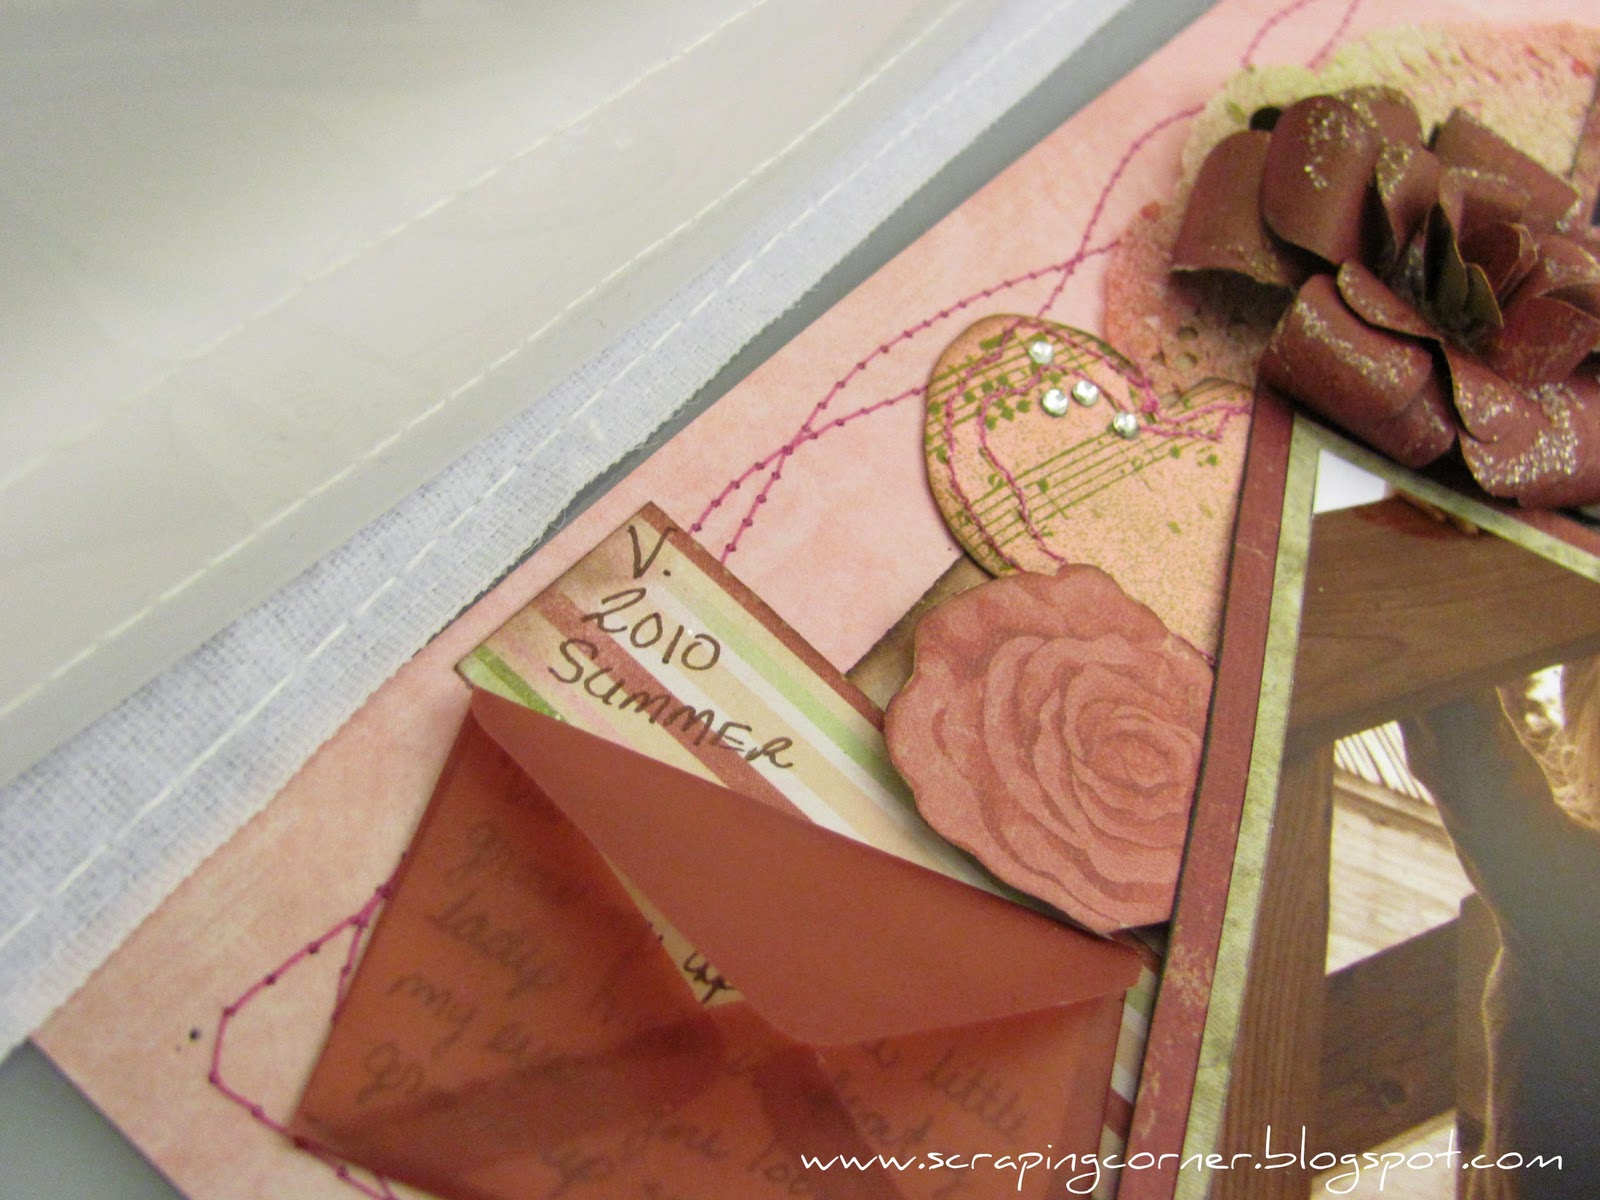
I made a couple of rough hearts and stitched around the outside of them, and used my new Stampin' Up wheel with Music Notes stamp (loving that right now) I thought I would try my hand at hidden journaling.  I had some little velum envelopes from EK Sucess (had them for about 5 years actually) the hidden journaling reads:
"Vanessa; you are growing up into a little lady right in front of my eyes; you look so grown up sometimes!!"


I used the Home Decor Cricut cartridge for the word "adore".  I used a prima Tea Rose - in Santa Rosa (this is one of the ones that I won a few months back) it worked perfectly (it is the little one on the bottom; I handmade the larger one on the left at the top).  I also glimmer misted a paper doily using Olive Vine and Viva Pink and misted some of the hearts and ribbons with the same.  I used my I-Rock for the first time on this ... not sure if I'm liking it or not (I know, Mandy, you love yours) but I am having a hard time getting the jems into the positions that I want, and keeping them there until I weld them down.  Any tips??


Let me know what you think of the layout, does it look anything like the sketch?

Monday, January 3, 2011

Sew ... I bought a new one!

Anyone who is on my Facebook surely knows I've been grumbling for a few weeks about my sewing machine having busted ... it was one of these cheap ones that is made by a company who make vacuum cleaners... all the internal parts were plastic and with sewing on paper it didn't last me two years ... need I say more? 

I had been hoping that I would get one for Christmas, and while my Mom did give me a sewing machine for Christmas it was all plastic parts too, and wasn't really designed for the abuse I'm going to put it through ... I am grateful Mom, don't get me wrong, your heart is in the right spot... thanks a bunch.

I went to a wonderful sewing shop in Ottawa today at 581 Bank Street - Yarn Forward & Sew On ... fantastic shop, I recommend it to anyone, the service is 2nd to none, and I was impressed with the knowledge and expertise there. 

I bought myself a Husqvarna Viking E20 ... man it runs smoothly ... you're going to see alot more stitching on my layouts and cards as of today I tell ya!


Isn't she beautiful?  OK, OK, I know, it's a sewing machine ;o)

Here is a sneak peek of a layout I'm doing - notice anything ... like say ...oh lots of stitching LOL!


Enjoy and remember to follow my blog!

Tuesday, December 28, 2010

My new toy!!

Well I'll tell ya, Christmas was great this year!  My husband bought me a new toy .... do you know what it is??


I also got a new scrapbooking box, an I-rock, and a mini sewing machine.  I think I may still buy a semi-decent new one for myself.  Not sure if this little one is going to do the trick or not, but we will see.

I also made a new card, this comes directly inspired from a card that was sent to my sister for Christmas from her friend Rae-Lynn in B.C.  I loved the card so much I asked her if I could 'lift' it!  She sent me a link to a blog post tutorial on this card - here is that link http://www.stampingvideos.com/2008/10/origami-christmas-trees.html

That's it for now folks, let me know what you think of my new toy ... leave me a comment as to what you believe it is!

Monday, December 20, 2010

Stampin Up Starter Kit Cards Contest

I made these two cards for a contest going on at Stampin' Up. You have to use ONLY the contents of your starter kit. It seems as though there is a lot of controversy over that though. I guess the kit has changed over the year, and others didn't know that you could customize the kit to contain patterned papers and ribbons ... well I figured it out, and I must say that I think I did alright.  They are picking five winners and each winner will get to pick a stamp set ... how cool would that be? 

I tried to throw a few techniques in there too.

For my first card, I distressed up the edges of the paper, I used my scissors on this one, but normally I would have used my Tim Holtz distresser (which Stampin' Up does sell, however it didn't come in the kit)  I also used my Chocolate Chip ink refill to dye my lace ribbon.  And as you know I love to ink the edges of absolutely everything, so I used the sponge that they provided in the kit. The colours I used are More Mustard and Chocolate Chip and the stamps that I used are from Word Play and Sense of Time collections.


The second card - and my favorite of the two - I used an embossing relief technique and my brand new Stampin' Wheel - loving that thing!  I used again the More Mustard and Cherry Cobbler this time.  What a combination I know!  After embossing with clear embossing powder and Versa Mark ink, I put the More Mustard ink on my craft mat and sprayed it down with water and ran the card through that.  After allowing it to dry I sponged on some Cherry Cobbler ink into the spots that were shy of ink for a little depth.  I love the way it turned out.  Then I used the Elizabeth stamp and two stamps from the Vintage Vogue collection for the sentiment.  I tore spiral circles and inked them for the flowers.  I will do a tutorial on spiral flowers soon on my blog; they are fun and easy to do. 

Thursday, December 16, 2010

Christmas cards & Vintage Tags

So ... what have I been doing with my time recently you ask?  Well I've been making all my Christmas cards, and tags ... I'm too cheap to buy them LOL!

I used a Basic Grey card kit and made a few of my own from the Jovial line.


I made my tags with my Cricut using the Plantin Schoolbook Tag1 at 3 1/2 inch and used a Bo Bunny stamp with Tim Holtz Distress ink in Peeled Paint, then distressed the outside with Worn lipstick distress ink.  I stamped with a Hero Arts snowflake using Stampin' Up Craft in in Whispter White and finished it off with a piece of twine for the tie.

I hope you enjoyed these.

Wednesday, December 8, 2010

Echo Park - Merry Christmas - stocking

Well hello there! 

I got the chance to work with the new Christmas collection pack from Echo Park - Merry Christmas.  I just love the traditional colours of mossy green and deep russet red, when they threw in some chocolate brown I was ... well, tickled pink!  I absolutely adore the music sheets there are in this collection.  I have so many plans for them. 

In the meantime I put together this little stocking project.  With a little gingerbread man escaping down from a dangling ornament. 


I created the stocking with a blanket stitch all the way around the perimeter and added the toe and heal in a contrasting green polka dot, and used a crimper on some plain white cardstock to add some texture for the top. 

I couldn't find a perfect match to the mossy green in the stickles that I had, so I mixed bronze, green and black together and painted it onto the edges of the holly leaves.  I added some red stickles and red gems to the berries of the holly. 

I used Glossy Accents on the candy canes to give them a shine like real candy.  The gingerbread man is traced with glitter and accented with brads for his eyes and buttons. 

I wanted to make the Christmas ornament pop, so I used a technique that I've done before when making pumpkins at Halloween, by cutting strips of patterned paper and gathering at the top and bottom with a brad and then spreading the strips apart to form a half ball.  This technique works well with ribbon too!

Thanks for looking and come back any time!

Total Pageviews

LinkWithin

Related Posts with Thumbnails