side bars

Showing posts with label TUTORIAL. Show all posts

Wednesday, May 1, 2013

Love my Maggies!

First of all I want to thank Janet for her kindness - you really made my day when you sold me all of your Magnolias, you have such good taste and its sad that you are giving up paper crafting, but you will enjoy the next journey in your life, I just know it!

I've been eyeing up all the blogs and YouTube tutorials on how to colour clouds with Copic markers ... there are so many different options out there, it was tough for me to choose one that I liked best.  I am so impressed with the way that Annika Ryan colours, and her clouds just made the most sense to me here is her YouTube tutorial Annika Ryan - YouTube

So, as I've been driving for the past week I have been looking at the clouds on the horizon and *noticing* the colours, and thinking about where the darker parts are, the light hits them etc.  Yeah, can you say I live an exciting life, hahaha!!

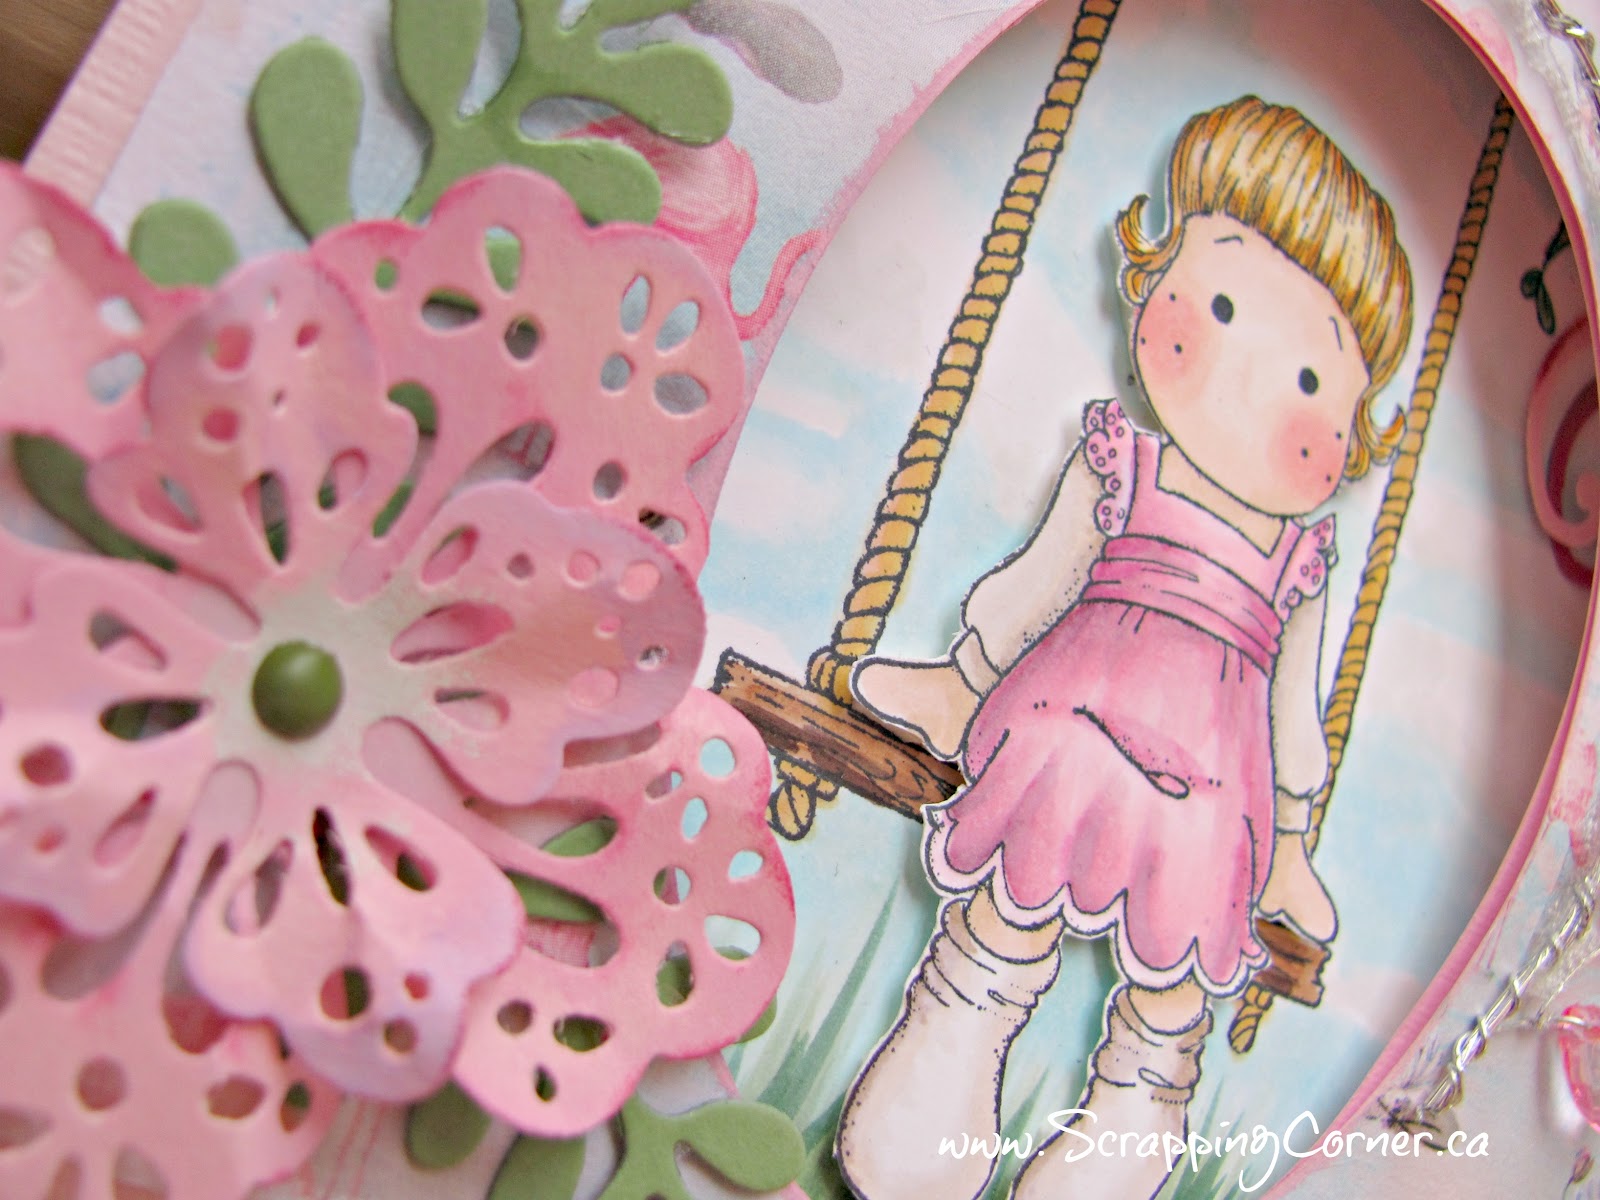
Well here is the result, I coloured up a couple of Maggies - the Tilda is supposed to have a bow behind her, but I fussy cut that off, and the swing stamp only had the small piece of a branch it attached to, so I added in the tree trunk to ground it, and little bit more branch.  I used Magnolia papers, doohicky's, and the gems are also Magnolia.


If you like this card and especially the clouds, let me know, I might be able to put together a class for Auntie Em's in June!!

Sunday, September 9, 2012

Heat Embossing on Vellum - Tutorial

 Heat Embossing on Vellum

Never under estimate the power of VELUM. One of my most favourite things to do is heat emboss on velum using my printer.I have an ink jet printer and with it I can print in any colour, unlike having to own several different colours of ink or embossing powder you can print out in any colour you like.

Printing on velum can be a little messy, remember that velum is a plasticized paper and therefore the ink will sit on top of the paper for a little while longer than standard printer paper.Once you have printed the velum, immediately cover the image with clear embossing powder , shake off the excess and heat.

Because there is so much ink sitting on top of the velum you get a very raised embossed image.I also like to use a metallic embossing powder for a metal look; add a little bit of distress ink and you have a tarnished metal look.

Use Versamark clear ink and clear embossing powder with a snowflake stamp for a subtle image that is sure to catch a few eyes.

Ingredients:
  • Ink jet printer
  • Velum
  • Clear embossing powder
  • Heat gun
  • Metallic embossing powder (optional)
  • Stamps (optional)
 Not shown here is my Ink Jet printer

Versamark clear ink, stamp, metalic embossing powder
Versamark ink, snowflake stamp and clear embossing powder


I printed several images with the Ink Jet printer - they are WET


Cover with clear embossing powder, shake off excess and heat emboss


Friday, September 7, 2012

Spiral flowers tutorial

 Paper - Scissors - Ink & Glue! (Spiral flowers)

 
If you are like me, I just drool over the pretty flowers that all those big names sell. I love how dimensional they are, how pretty they look.

Here is a quick tutorial for a flower bud that doesn't require the use of any die cutting machine. Infact all you need is Paper, Scissors, Ink and Glue!
I have so many of those decorative edge scissors hanging around, I rarely use them any more, but here is a chance to use the one that looks like a scalloped edge.


Directions:1. Stamp any image onto a sheet of cardstock. Here I used a text based stamp.
2. With the scalloped scissors cut circle shapes. About 1 1/2" in diameter.
3. With the scalloped scissors cut the circle into a spiral. Keep the edges about 1/2" wide.
4. With regular scissors cut slits in between the scallops.
5. Ink the edges of the scallops and on the slits.
6. Using your fingers or a pair of tweezers, start at the middle and spiral in.
7. Keep rolling inwards until you have a tight flower 'bud'
8. Glue from the underside, hold until set.
9. Open the flower petals outward by pulling back the outer parts first.

Here are some photos to help you out. Let me know what you think?


Wednesday, September 5, 2012

Gift Card Holder - Tutorial

I love to create my own handmade gifts for my loved ones at Christmas time. However there are some you just don't know what to make for. That's when I give gift cards so that they can buy what they would like!
So, here is a beautiful gift card holder that I designed to look like a wallet.


I used my Big Shot to dry emboss a leather grain onto some white paper (8 1/2 x 4 1/2) so when it is folded it is almost square.


I then used two different colours of distress ink to give it a worn leather look.


I covered the whole paper with clear heat embossing powder and heated it to give a very shiny look to it.


I cut strips of paper of different heights for pockets to hold the gift cards.


I hand stitched the edges for a more authentic look.


Added a ribbon and 'hitch ball' closure.

Sunday, March 13, 2011

Circle Punch flower - tutorial

Here is a tutorial on a flower I have recently made - I've been calling it a "water flower" but it would more accurately be called a Circle Punch flower.  I was calling it water flower because you use a water mister to make the petals wet so they are malleable.

You will need:

- patterned paper or cardstock
- circle punch (I used 1 1/8")
- water mister
- distress ink
- stapler
- button for centre

Step OnePunch 7 circles.  Six will be the petals, one will be the base.


Step Two

Mist the 6 circles with water, then ink with distress ink on the edges.  Remember that Distress ink reacts to water, this gives a neat effect on the petals.


Step Three

Fold a pleat into each of the six moist circle petals and secure with a staple at the base of the pleat.

Step Four

Staple each of the petals onto the base circle.  Work in a clockwise fashion overlapping the previous petal.


Step Five


Create a centre to your flower.  You can use a large brad or I have used buttons with twine.


Voila, you now have a pretty little dimensional flower!

Let me know what you think - become a follower of the blog - I'm always posting nifty stuff :o)


Monday, August 2, 2010

Flowers WITHOUT a die Cut machine - (TUTORIAL)

One of the most asked questions I get is how to make a flower without having a die cut machine like a Cricut or Sizzix etc.  Well here is the tutorial for you! 

All you need is:
                 - sissors
                 - glue (I used Elmer's White glue)
                 - ink for distressing
                 - a cutter
                 - paterned paper

Step ONE

Cut five squeres of paterned paper, one each of the following sizes- 4x4; 3.5 x3.5; 3x3; 2.5x2.5; 2x2

Step TWO

Fold each square in half (corner to corner) into a triangle.

Step THREE

Fold the triangle into a cone shape by bringing each coner up to the top (as pictured)


Step FOUR

Cut a "petal" shape by trimming off the tops of each of the cone folded papers


Step FIVE

Ink the edges of your flowers


Step SIX

Cut between two of the petals down to the centre - once on each flower.


Step SEVEN

Glue the underside of petal on the left of the cut section to the top of the petal to the right of the cut section.  Repeat this for the largest four flowers.


Step EIGHT

For the smallest of the flowers, cut one petal out, and glue the petals to the left and right of the gap together.

Step NINE

Curl all of the petals under (I used a paint brush handle)

Step TEN

Stack your flowers on top of each other; gluing between layers.  Ensure that you stagger your petals for a fuller effect.  Fluff the flower and YOUR DONE!


For more effect you can add a button to the centre or beads.  You can also glue glitter to the petals.


Let me know what you think! Show me your results!

Total Pageviews

LinkWithin

Related Posts with Thumbnails